Showing posts with label SPRING ONION. Show all posts

Thursday, 10 August 2017

COUSCOUS SALAD WITH ROAST SUMMER VEGETABLES


Packed lunches are a bit of a necessity when you're out and about with kids - they want to eat when they want to eat (waiting for it to be cooked is not an option) and what they want to eat (whether it's on the menu or not). As a result, my family eats a LOT of picnics at this time of year. Not that I'm complaining - even the simplest of lunches tastes amazing eaten in the great outdoors, especially if you've been active enough to work up an appetite beforehand. While my kids are more than happy with a sandwich or wrap, I like to change things up and will often take along a salad for my lunch. This couscous salad is a current favourite - it tastes just as good cold as it does hot, it is full of flavour, and it is robust enough to withstand transportation.

As well as being a great picnic dish, it would make a fantastic accompaniment to grilled meat (especially lamb skewers) at a barbecue, and I'm looking forward to trying it with grilled halloumi the next time I make it. This quantity of couscous salad will serve four as a light lunch or six as a side dish.


Couscous Salad with Roast Summer Vegetables

Serves 4-6

Roast summer vegetables
1 red pepper
1 yellow pepper
2 small red onions
2 courgettes
8 garlic cloves (optional)
2 tbsp olive oil
1 tsp dried oregano

Couscous
250g couscous
1 tsp each ground cumin, ground coriander and paprika
4 spring onions, finely sliced
325ml hot vegetable stock
juice and grated rind of 1 lemon
300-g can chickpeas, drained and rinsed

ground black pepper

Preheat the oven to 200°C/400°F/Gas Mark 6.

First, prepare the vegetables. Deseed the peppers and cut the flesh into 2.5-cm chunks. Peel the onions, removing any roots but keeping the root ends intact. Slice each onion in half through the root, then cut each half into four wedges through the root so the layers don't separate. Trim the ends off the courgettes. If the courgettes are thick, cut them in half lengthways before cutting them into 1-cm-thick slices. Finally, break the garlic cloves, if using, from the bulb but do not remove the papery skins.

Put all the vegetables in a large food bag, pour in the oil and add the oregano and pepper to taste. Holding the top firmly, shake the bag until the vegetables are thoroughly coated in the oil and seasonings. Tip the contents of the bag into a large roasting tin. Transfer to the preheated oven and bake, stirring occasionally, for 30-35 minutes, or until the vegetables have softened and the edges are brown in places.

Meanwhile, prepare the couscous. Put the couscous into a large heatproof bowl and stir in the spices and spring onions. Pour in the hot stock, then cover and leave to stand for at least 5 minutes. Fluff up the grains with a fork, then stir in the lemon juice, lemon rind, chickpeas and pepper to taste.

Remove the roast vegetables from the oven and leave to cool down for a few minutes, then add to the couscous and gently stir through. Serve immediately or leave to cool down slightly and transfer to the fridge - this couscous salad is delicious eaten hot or cold.


Tips
  • To eat the garlic, simply squeeze the soft pulp out of the papery skin. Roasting garlic like this mellows the flavour, making it almost sweet and not at all pungent.

Friday, 3 March 2017

CHICKEN & VEGETABLE CHOW MEIN


Takeaways are a great treat, especially at the end of a long week when you just want to flop in front of the telly with something tasty to eat and a nice glass of wine. However, they can be a very expensive option, not to mention hugely calorific as it's always tempting to order far more food than you actually need (eyes-bigger-than-belly syndrome). And I've lost count of the amount of time I've sat around impatiently waiting for a takeaway whilst knowing full well that I could have made it myself in less time.

This recipe is my take on chicken chow mein and, whilst it's is probably far from authentic, it's one of my favourite Chinese-style meals. It's essentially a stir-fry (although with the small quantity of oil I use, the vegetables end up being steamed rather than fried) with added seasonings to give it a real flavour kick. This is a great fall-back option when the cupboards are bare because it relies on mostly storecupboard ingredients, plus a few fresh vegetables that can be varied depending on whatever odds and ends you have in the fridge. It's also a good way to use up leftover roast chicken - simply add it with the beansprouts and spring onions.

My kids are still not mad keen on mixed-up foods so this isn't something I make for them at the moment but I hope to in the future. I sometimes find that giving them a deconstructed version of a dish (in this case, plain noodles, chicken and raw vegetable strips with soy sauce on the side for dipping) can help introduce them to new meals so I will probably try doing that.


Chicken & Vegetable Chow Mein

Serves 2 generously

125g dried medium egg noodles
1 tbsp groundnut oil
5-cm piece fresh ginger, peeled and finely chopped
2 garlic cloves, finely chopped
1 fresh red chilli, deseeded and finely chopped
350g skinless, boneless chicken breasts, cut into thin strips
1 red pepper, deseeded and thinly sliced
2 carrots, peeled and cut into julienne slices
4 spring onions, shredded lengthwise
2 handfuls of fresh beansprouts
½-1 tsp crushed chilli flakes (optional)
2 tbsp dark soy sauce
2 tsp toasted sesame oil

Bring a medium saucepan of water to the boil. Add the noodles and bring back to the boil, then cook for 3-4 minutes, or according to the packet instructions. Drain.

Meanwhile, heat the groundnut oil a in a large saucepan or wok over a high heat. Add the ginger, garlic and red chilli and cook, stirring constantly, for 30 seconds. Add the chicken and continue to cook, stirring, for 3-4 minutes, or until the chicken is sealed all over.

Stir in the peppers and carrot and cook, stirring frequently, for a further 3 minutes. Add the spring onions and beansprouts and continue cooking for 1 minute, or until the vegetables are softened and the chicken is cooked through.

Add the drained noodles along with the chilli flakes (if using) and soy sauce and, using tongs, toss well to combine. Finally, drizzle over the sesame oil, toss briefly and transfer to serving dishes.


Tips
  • It's best to have all the ingredients chopped and ready before you start cooking (getting all your ducks in a row, so to speak). There's a fair amount of  preparation to do with this recipe, but this is more than compensated by the super-quick cooking time.
  • If the noodles are cooked before you're ready to add them to the chicken and vegetables, drain them and toss in half the sesame oil to prevent them from sticking together in one big clump.
  • This recipe is really adaptable - the chicken can be replaced with pork fillet, rump steak, prawns or Quorn pieces - and it's a good way to use up whatever bits of vegetables you have lurking in the fridge too. Just make sure that everything is chopped thinly so it cooks evenly and add any vegetables that require a longer cooking time to the pan first. If you have any salad leaves that need using up, throw in a handful along with the noodles and stir to wilt.
  • Crushed chilli flakes are pretty fiery so if you are cooking this for kids it's probably best to leave them out at the cooking stage - you can always sprinkle some over the adults' portions at the end.

Monday, 26 September 2016

CHICKEN & CHORIZO QUESADILLAS

This past weekend I seem to have come over all Mexican, what with fajitas (recipe to follow another time) for dinner on Friday, chilli con carne (recipe here) on Saturday and quesadillas for lunch on Sunday. It wasn't planned it just happened like that!

Quesadillas make a really tasty a weekend lunch. The great thing is that you can vary the fillings to suit each person  for example, my husband doesn't like the spring onion so I'll leave it out of his tortilla, and the kids don't like the spring onion or red pepper but will have extra sweetcorn instead. The recipe below is for my favourite version but feel free to swap and change the filling ingredients to suit your own tastes (chopped fresh chillies and coriander make nice additions). The only thing I would say is that some kind of cheese is pretty essential as it 'glues' the two halves of tortilla together.

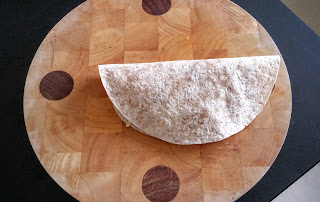
I guess I make my quesadillas in a fairly unconventional way because they're usually made by sandwiching the filling between two tortillas, whereas I fold each tortilla in half. I like my method because I find it easier to flip the individual tortillas, plus I think they hold together better when you're eating them too.


Everyone in my family likes to have something to dip their quesadilla into so I'll serve natural yogurt (which is lower in fat than soured cream) and occasionally some guacamole alongside. PLEASE NOTE that however many quesadillas you think you need, I'd highly recommend adding one more. We usually manage to get through five between the four of us and that's bearing in mind that the toddler only has half of one!


Chicken & chorizo quesadillas

Makes 2
2 flour tortillas
80g ready-grated Cheddar and mozzarella (sometimes called 'pizza cheese')
40g red pepper, diced
2 spring onions, chopped
30g frozen sweetcorn, thawed
30g diced chorizo
40g cooked chicken breast, shredded
vegetable oil, for brushing
natural yogurt, to serve

Place the first tortilla on a flat surface (such as a chopping board or the worktop). Sprinkle 20g of the cheese over one semi-circular half of the tortilla, leaving a small gap around the edge. Scatter half of the red pepper, spring onion, sweetcorn, chorizo and chicken over the cheese-topped side of the tortilla, then top with another 20g of the cheese. Fold the tortilla in half to cover the filling. Repeat with the second tortilla and the remaining filling ingredients.

Brush a frying pan large enough to hold both tortillas (I use a 24-cm saut̵é pan) with oil and place over a mediumhigh heat. Once hot, place the tortillas into the pan with both folded edges in the centre. Cook for 34 minutes, or until golden brown underneath. Carefully turn each tortilla using a fish slice and cook on the other side for a further 23 minutes.

Transfer the quesadillas to a chopping board and cut into wedges (I find it easiest to use a pizza wheel to do this). Serve with natural yogurt for dipping.