Showing posts with label LUNCHES. Show all posts

Thursday, 10 August 2017

COUSCOUS SALAD WITH ROAST SUMMER VEGETABLES


Packed lunches are a bit of a necessity when you're out and about with kids - they want to eat when they want to eat (waiting for it to be cooked is not an option) and what they want to eat (whether it's on the menu or not). As a result, my family eats a LOT of picnics at this time of year. Not that I'm complaining - even the simplest of lunches tastes amazing eaten in the great outdoors, especially if you've been active enough to work up an appetite beforehand. While my kids are more than happy with a sandwich or wrap, I like to change things up and will often take along a salad for my lunch. This couscous salad is a current favourite - it tastes just as good cold as it does hot, it is full of flavour, and it is robust enough to withstand transportation.

As well as being a great picnic dish, it would make a fantastic accompaniment to grilled meat (especially lamb skewers) at a barbecue, and I'm looking forward to trying it with grilled halloumi the next time I make it. This quantity of couscous salad will serve four as a light lunch or six as a side dish.


Couscous Salad with Roast Summer Vegetables

Serves 4-6

Roast summer vegetables
1 red pepper
1 yellow pepper
2 small red onions
2 courgettes
8 garlic cloves (optional)
2 tbsp olive oil
1 tsp dried oregano

Couscous
250g couscous
1 tsp each ground cumin, ground coriander and paprika
4 spring onions, finely sliced
325ml hot vegetable stock
juice and grated rind of 1 lemon
300-g can chickpeas, drained and rinsed

ground black pepper

Preheat the oven to 200°C/400°F/Gas Mark 6.

First, prepare the vegetables. Deseed the peppers and cut the flesh into 2.5-cm chunks. Peel the onions, removing any roots but keeping the root ends intact. Slice each onion in half through the root, then cut each half into four wedges through the root so the layers don't separate. Trim the ends off the courgettes. If the courgettes are thick, cut them in half lengthways before cutting them into 1-cm-thick slices. Finally, break the garlic cloves, if using, from the bulb but do not remove the papery skins.

Put all the vegetables in a large food bag, pour in the oil and add the oregano and pepper to taste. Holding the top firmly, shake the bag until the vegetables are thoroughly coated in the oil and seasonings. Tip the contents of the bag into a large roasting tin. Transfer to the preheated oven and bake, stirring occasionally, for 30-35 minutes, or until the vegetables have softened and the edges are brown in places.

Meanwhile, prepare the couscous. Put the couscous into a large heatproof bowl and stir in the spices and spring onions. Pour in the hot stock, then cover and leave to stand for at least 5 minutes. Fluff up the grains with a fork, then stir in the lemon juice, lemon rind, chickpeas and pepper to taste.

Remove the roast vegetables from the oven and leave to cool down for a few minutes, then add to the couscous and gently stir through. Serve immediately or leave to cool down slightly and transfer to the fridge - this couscous salad is delicious eaten hot or cold.


Tips
  • To eat the garlic, simply squeeze the soft pulp out of the papery skin. Roasting garlic like this mellows the flavour, making it almost sweet and not at all pungent.

Friday, 12 May 2017

SPEEDY PITTA PIZZAS


These pitta pizzas are so quick and easy to put together, making them perfect for an after-school dinner or a weekend family lunch. If you're particularly hungry, you could cook some oven chips to serve with them or add some vegetable sticks or salad on the side.

You can use whatever toppings you like - well, any that are child-approved anyway! I've given a recipe for a simple vegetarian topping here, but have included suggestions for alternative ingredients below. My girls' favourite topping is sweetcorn and pepperoni.

My kids love to help to make these and I usually set out the prepared toppings in little bowls so they can choose whichever they want (any leftovers can be tossed into a salad). This is a good activity to do when your child has a friend over and you're not sure what toppings the visiting child likes, plus it seems to be something the kids enjoy doing and it produces a fairly minimal amount of mess.


Speedy Pitta Pizzas


Makes 2

2 white or wholemeal pittas
2 tbsp frozen sweetcorn
1 tbsp chopped red onion
¼ green pepper, deseeded and sliced
4 button mushrooms, sliced
55g grated mozzarella and Cheddar cheese

Tomato pizza sauce
1 tbsp tomato purée
2 tbsp passata
½ tsp dried oregano

Preheat the oven to 200°C/400°F/Gas Mark 6.

In a small bowl, mix together all the ingredients for the tomato pizza sauce.

Place the pittas on a baking sheet and top with the tomato pizza sauce, spreading it right to the edges. Arrange the sweetcorn, onion, green pepper and mushrooms on top, then cover with the grated cheese.

Transfer to the preheated oven and bake for 10-12 minutes, until the cheese is melted and slightly browned.


Our favourite toppings:
  • Cooked chicken, red peppers, mushrooms and sweetcorn
  • Pepperoni, green peppers, onions and black olives
  • Pepperoni and sweetcorn
  • Ham, pineapple and sweetcorn
  • Ham, mushrooms and black olives

This is a great recipe for getting some veggies into your child. Even if they're not keen on vegetable toppings, just one tablespoon of tomato purée counts as one of their five-a-day. Add vegetable crudités on the side or perhaps some sweet potato fries and you're on to a winner!

Monday, 20 March 2017

MIXED BEAN CHILLI


Here's a little something for meat-free Monday! Even though we're a family of omnivores, I think it's important to incorporate meat-free food into our weekly menu, so I usually try to make at least one vegetarian dinner a week, and our lunches are often meatless. Actually, come to think of it, this particular recipe would be suitable for a vegan diet too, if you omit the yogurt accompaniment or swap it for a dairy-free alternative.

Sadly (although predictably), this chilli turned out to be a bit on the spicy side for my kids (and a bit on the vegetarian side for my husband, a confirmed meat-eater) but it freezes well so a batch lasts me a while. I like to eat it for lunch as a filling for a baked potato or, if I'm feeling slightly less virtuous, I'll serve with tortilla chips and a good dollop of cooling natural yogurt.

The vegetables and beans in this tasty chilli all count towards your five-a-day (although apparently beans only count as one portion a day, no matter how many you eat) so I reckon you'd be well on your way to this target if you ate this for lunch or dinner.


Mixed Bean Chilli (vegetarian/vegan)


Serves 4

½ tbsp vegetable oil
1 onion, finely chopped
2 garlic cloves, finely chopped
1 fresh red chilli, deseeded and finely chopped
2 tsp each ground cumin and paprika
1 tsp mild chilli powder
1 each red, yellow and red pepper, deseeded and diced (360g total prepared weight)
400-g can chopped tomatoes
400-g can mixed beans in mild chilli sauce
400-g can red kidney beans in water, drained and rinsed
200-g can chickpeas, drained and rinsed
1 tbsp tomato purée
2 tbsp chopped fresh coriander

Heat the oil in a large saucepan over a low-medium heat and cook the onion for 8-10 minutes, or until softened. Add the garlic and red chilli and cook for a further minute.

Add the cumin, paprika and chilli powder and mix until the onion is coated in the spices. Increase the heat to medium-high, then stir in the peppers, tomatoes, beans, chickpeas and tomato purée.

Bring to the boil, then reduce the heat and simmer, stirring occasionally, for 30 minutes, until thick and reduced. Stir in the coriander just before serving.

Monday, 16 January 2017

BROCCOLI & STILTON SOUP

January is definitely a soup kind of month - there's something immensely comforting about eating a steaming hot bowl of soup when the weather is as chilly as it has been lately. It's also a great portable lunch - I often used to pack up a thermos of soup when I worked in an office. I admit that this recipe is not all that dissimilar to the Cauliflower Cheese Soup I posted a while back (link here) but I hope you'll forgive me because the end result tastes quite different. Although the cheese (and butter) in it might not be so great for the waistline, this soup does at least deliver one of your five-a-day. It's also s(o)uper tasty!

If I'm perfectly honest, my main reason for making this soup was to use up the last of our Christmas cheeseboard. We had a really nice selection of British cheeses this year - creamy Somerset Brie, crumbly Wensleydale with cranberries, tangy vintage Cheddar and strong blue Stilton. I do love a good cheeseboard, but I'm not someone who regularly eats cheese on its own so most of the leftovers were used up in cooking. I just love how oozy and gooey cheese goes when it's melted - yum! There are loads of tasty ways to use Stilton in cooking - my favourites are to add nuggets of it to macaroni cheese and to crumble it over a mushroom or squash risotto.


Broccoli & Stilton soup

Serves 3-4

10g butter
2 tsp vegetable oil
1 onion, chopped
1 garlic clove, chopped
150g (peeled weight) potato, peeled and cut into 1-cm cubes
225g broccoli, separated into florets
750ml vegetable stock (I used Marigold Swiss Vegetable Bouillon Powder)
100g Stilton (or other blue cheese), cubed
freshly grated black pepper and nutmeg, to season

Heat the butter and oil in a large saucepan over a lowmedium heat. Add the onion to the pan and cook, stirring occasionally, for 8 minutes, until softened. Stir in the garlic and cook for a further minute. Add the potato, increase the heat a little and cook for 5 minutes.

Put the broccoli into the pan and pour over the stock - don't worry if the stock doesn't quite cover the broccoli. Bring to the boil, then partially cover the pan and simmer for 15 minutes, or until the broccoli is very tender.

Season to taste with plenty of black pepper and nutmeg. Remove the pan from the heat and, using a hand-held stick blender, process the soup in the pan until smooth (or leave the soup a little chunky if you prefer).

Add the Stilton to the soup, return the pan to a low heat and stir until melted. Transfer to bowls and serve.


Tips
  • Skip the butter if you're counting the calories - it's there for the flavour but the soup will taste perfectly fine without it.
  • I use the broccoli stalk as well as the florets - just remember to peel off and discard the thick outer skin before slicing.
  • A stick blender makes the job of blending soup incredibly easy but you can, of course, use a blender or food processor instead. Just allow the soup to cool down a little before processing and work in batches if necessary.
  • I like my soup thick, but feel free to add extra stock (or even a little milk) if you prefer a thinner consistency.

Monday, 26 September 2016

CHICKEN & CHORIZO QUESADILLAS

This past weekend I seem to have come over all Mexican, what with fajitas (recipe to follow another time) for dinner on Friday, chilli con carne (recipe here) on Saturday and quesadillas for lunch on Sunday. It wasn't planned it just happened like that!

Quesadillas make a really tasty a weekend lunch. The great thing is that you can vary the fillings to suit each person  for example, my husband doesn't like the spring onion so I'll leave it out of his tortilla, and the kids don't like the spring onion or red pepper but will have extra sweetcorn instead. The recipe below is for my favourite version but feel free to swap and change the filling ingredients to suit your own tastes (chopped fresh chillies and coriander make nice additions). The only thing I would say is that some kind of cheese is pretty essential as it 'glues' the two halves of tortilla together.

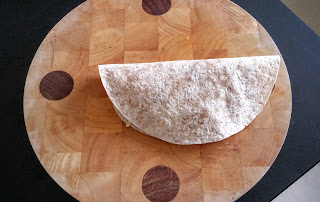
I guess I make my quesadillas in a fairly unconventional way because they're usually made by sandwiching the filling between two tortillas, whereas I fold each tortilla in half. I like my method because I find it easier to flip the individual tortillas, plus I think they hold together better when you're eating them too.


Everyone in my family likes to have something to dip their quesadilla into so I'll serve natural yogurt (which is lower in fat than soured cream) and occasionally some guacamole alongside. PLEASE NOTE that however many quesadillas you think you need, I'd highly recommend adding one more. We usually manage to get through five between the four of us and that's bearing in mind that the toddler only has half of one!


Chicken & chorizo quesadillas

Makes 2
2 flour tortillas
80g ready-grated Cheddar and mozzarella (sometimes called 'pizza cheese')
40g red pepper, diced
2 spring onions, chopped
30g frozen sweetcorn, thawed
30g diced chorizo
40g cooked chicken breast, shredded
vegetable oil, for brushing
natural yogurt, to serve

Place the first tortilla on a flat surface (such as a chopping board or the worktop). Sprinkle 20g of the cheese over one semi-circular half of the tortilla, leaving a small gap around the edge. Scatter half of the red pepper, spring onion, sweetcorn, chorizo and chicken over the cheese-topped side of the tortilla, then top with another 20g of the cheese. Fold the tortilla in half to cover the filling. Repeat with the second tortilla and the remaining filling ingredients.

Brush a frying pan large enough to hold both tortillas (I use a 24-cm saut̵é pan) with oil and place over a mediumhigh heat. Once hot, place the tortillas into the pan with both folded edges in the centre. Cook for 34 minutes, or until golden brown underneath. Carefully turn each tortilla using a fish slice and cook on the other side for a further 23 minutes.

Transfer the quesadillas to a chopping board and cut into wedges (I find it easiest to use a pizza wheel to do this). Serve with natural yogurt for dipping.

Thursday, 22 September 2016

CAULIFLOWER CHEESE SOUP


I've been wanting to make this soup for a few weeks but couldn't quite bring myself to do so because it would be like admitting that summer was over. I know that there are lots of lovely summery soup recipes out there, but for me soup will always be an autumn/winter meal  a cosy, comforting kind of food that is as synonymous with the chillier months of the year as falling leaves, winter woollens and crackling log fires. Well, it's now (as of yesterday) officially autumn here in the UK, so I figured that there could be no better way to mark the changing seasons than by cooking up a batch of one of my favourite soups.

I think this recipe started out as a broccoli and Stilton soup (which, in my opinion, is equally tasty) and evolved from there. If I'm perfectly honest, no-one in my family eats cauliflower (although I persevere with offering it to the kids) and my oldest child doesn't eat soup, so I'm not exactly on to a winner here with my family. It's no great hardship  all the more yummy soup for me!

It's important to use a good strong Cheddar cheese in this recipe. I like to use a bit of butter when I'm making a creamy soup because I think it adds to the flavour, but you don't have to  just use a little more oil. This is not a slimming soup (although there's no reason you couldn't enjoy it while dieting if you watch the portion size) but given that my body is going to be spending the next few months shrouded in layers of winter clothes I couldn't care less!


Cauliflower cheese soup

Serves 4

10g butter
2 tsp vegetable oil
1 onion, chopped
1 garlic clove, chopped
150g (peeled weight) potato, peeled and cut into 1-cm cubes
1 head of cauliflower, separated into florets (about 600g prepared weight)
750ml vegetable stock (I used Marigold Swiss Vegetable Bouillon Powder)
115g extra-mature vegetarian Cheddar cheese, grated
pinch of freshly grated nutmeg

Heat the butter and oil in a large saucepan over a lowmedium heat. Add the onion to the pan and cook, stirring occasionally, for 8 minutes, until softened. Stir in the garlic and cook for a further minute. Add the potato, increase the heat a little and cook for 5 minutes.

Put the cauliflower into the pan and pour over the stock - don't worry if the stock doesn't quite cover the cauliflower. Bring to the boil, then partially cover the pan and simmer for 15 minutes, or until the cauliflower is very tender.

Remove the pan from the heat and add the cheese, stirring until melted. Season to taste with grated nutmeg. Using a hand-held stick blender, process the soup in the pan until smooth (or leave the soup a little chunky if you prefer).

Transfer to bowls, sprinkle over extra grated cheese and nutmeg (if you like) and serve.

Friday, 16 September 2016

LAYERED PRAWN PASTA SALAD JARS


For my lunch today I celebrated the unseasonably warm weather we've been enjoying here in south-west England with a salad. And not just any old salad –  a salad in a jar!

I fear I'm a bit late to the party when it comes to food in a jar. No longer the preserve (see what I did there?) of jams and chutneys, it seems that jars are being used to package and present all kinds of foods – from breakfast oats (see my overnight oats recipe) to salads like this one, even cakes and desserts. And, whilst I don't go out on the town much these days, I wouldn't be in the slightest bit surprised if the next time I order a cocktail in a trendy bar it was served up in a jam jar!

I think a lot of the appeal of jar food is its convenience. Many foods will keep for several days in a sturdy, well-sealed jar so, with just a little forward planning, you can prepare tasty meals ready to enjoy when you're pushed for time. The jar also offers a perfect way to transport food and negates the need for any crockery – just eat straight from the jar! Sure, it'll probably turn out to be a passing fad, but you can't deny that jar food is aesthetically pleasing, especially when it includes colourful fresh fruits and/or veggies arranged in pretty layers.

I think salads work particularly well as jar food because the jars can be packed in such a way as to keep delicate salad items separate from any heavier ingredients (that may crush them) and sauces or dressings (that could make them soggy). So whatever ingredients you're using, I'd highly recommend putting any sauces or dressings in the base of the jar along with any heavy ingredients (such as pasta or beans) and popping the salad leaves right at the top.

I freely admit that this salad isn't entirely my own invention – it is my version of a pre-packaged salad I used to buy from a high-street supermarket when I worked in town. I added the red pepper, mainly because I thought it'd look pretty, and swapped the shop-bought version's iceberg lettuce with spinach because I've read darker leaves offer more health benefits (plus spinach is the only salad leaf that has my eldest daughter's seal of approval!). I also lightened up the Marie Rose sauce by replacing some of the mayo with fat-free yogurt. This makes two rather generous portions.

Layered prawn pasta salad jars

Serves 2
80g small pasta shapes (I used conchigliette)
200g cooked peeled prawns, defrosted if frozen
½ red pepper, deseeded and diced
1 carrot, grated
100g sweetcorn, defrosted if frozen
¼ cucumber, diced
2 large handfuls of baby spinach leaves

Marie Rose sauce
2 tbsp light mayonnaise
2 tbsp fat-free Greek yogurt
2 tsp ketchup
1 tsp Worcestershire sauce
squeeze of lemon juice, to taste

Bring a saucepan of water to the boil. Add the pasta, bring back to the boil and cook for 6 minutes, or according to the packet instructions, until tender but still firm to the bite. Drain, rinse under cold running water and drain well.

While the pasta is cooking, make the sauce. Put all the sauce ingredients in a medium-sized bowl and mix well. Add the prawns and stir to coat thoroughly in the sauce.

Divide the ingredients between two 950-ml jars, starting with the prawn mixture, then adding the pasta, red pepper, carrot, sweetcorn, cucumber and spinach (in that order) to create colourful layers in the jars.

Eat immediately or chill and eat within 48 hours. You can eat straight from the jar or tip the contents onto a plate before tucking in (the latter method is easier, unless you have a really long-handled fork!).

Tuesday, 6 September 2016

COURGETTE, PEA & FETA FRITTATA

I wouldn’t consider myself a fussy person (when it comes to food anyway) but I’ll admit that I’m not a huge fan of eggs. It’s not the egg per se, more the yolk (I know, I know - that’s supposed to be the best bit!) and I need my eggs to be cooked all the way through or it makes me feel quite queasy. Weird, eh? That’s what’s so great – in my eyes at least – about frittatas. Unlike with an omelette, which can be a bit gelatinous for my liking, when you make a frittata you place the frying pan under the grill to finish it off so the eggs are guaranteed to be fully cooked.
I’ve been eating frittatas for lunch quite often recently. They’re pretty healthy, very filling and a great way to use up odds and ends of ingredients. I also like the fact that they’re a one-pot meal – I have enough washing up to do come dinnertime without adding to the pile!
This version with feta, courgette and peas is one of my favourites – the salty feta adds a great hit of flavour. If I have a bag of salad leaves in the fridge (and they haven’t gone slimy yet), I’ll pop a handful of those to the top of the frittata to add to the veg count.
It's important to use the right size of frying pan for this recipe - too big and the egg mixture won't cover all the vegetables. The one I use has a diameter of 20cm.


Courgette, pea & feta frittata

Serves 1  
1 tsp olive oil
½ large courgette, diced
2 spring onions, sliced
Small handful of frozen peas
3 large eggs
1 tbsp milk
1 tbsp chopped fresh mint (or ½ tsp dried mint)
45g vegetarian feta cheese, cut into small cubes
Handful of watercress or other salad leaves, to serve


Heat the oil over a medium heat in a small ovenproof frying pan. Add the courgette to the pan and cook, stirring occasionally, for 5 minutes, or until the courgette has started to brown at the edges. Add the spring onions and peas and cook for a further minute. Meanwhile, preheat the grill.  

Crack the eggs into a jug and add the milk and mint. Beat well, then gently stir in the feta cheese. Pour the egg mixture into the frying pan and shake so it covers all the vegetables and the ingredients are evenly distributed.
Continue cooking until the underside of the frittata is brown and set, then place the frying pan under the preheated grill.  Cook for 3-4 minutes, until the top of the frittata is golden and bubbling. Slide out of the frying pan onto a plate. Cut the frittata into wedges and top with the watercress leaves. Eat!