Showing posts with label FAMILY FAVOURITES. Show all posts

Sunday, 26 November 2017

STICKY TOFFEE PUDDINGS


Ever since the days started getting colder and darker (boo!), I've been craving warming, comforting foods. I'm loving roast dinners at the moment, especially since the girls have finally decided that they quite like them too. Isn't it a great feeling when kids suddenly decide - after months or even years of shunning a certain food or meal - that they DO like it after all? Of course, they might change their notoriously fickle minds again next week so I'll make the most of this while I can!

As far as I'm concerned, a roast dinner simply must be followed by a decadent pud, and you can't get much more decadent than a classic sticky toffee pudding. My version is made using individual basins and it is steamed to make the most deliciously moist, self-saucing puddings. And with Christmas Day being just four weeks away tomorrow (sorry to remind those of you who are still in denial), these mini puddings would make a great prepare-ahead alternative to the traditional Christmas pudding if, like me, you're not a fan.

Before I had kids to cater for, making cakes and desserts was my absolute favourite kind of cooking but, with less free time and more focus on healthy family meals, I've found myself doing less baking in recent years. I'd actually forgotten how easy this recipe is - sure, there are a few stages involved but none of them is especially difficult.  It's a great recipe to try when you have a little time to potter around in the kitchen.

I love the fact these desserts are portion-controlled (a single pudding will easily feed two children or one hungry grown-up) and any leftover puds can be whacked in the freezer for another day. Call me boring, but feeding my freezer makes me very happy!


Sticky Toffee Puddings

Makes 6

150ml boiling water
½ tsp bicarbonate of soda
125g dates, chopped
175g plain flour
2 tsp baking powder
40g cold unsalted butter
125g caster sugar
1 large egg, beaten

Toffee sauce
140g dark muscovado sugar
85g unsalted butter
4 tbsp (60ml) double cream

vanilla ice cream, custard or cream, to serve

To make the toffee sauce, put the muscovado sugar, butter and cream into a small saucepan over a low-medium heat. Stir until the butter has melted and the sugar has dissolved, then gently bring to the boil. Divide the sauce equally between six 150-ml non-metallic pudding basins and transfer to the fridge for at least 1 hour. The sauce needs to set a little before you add the sponge mixture on top.

Meanwhile, pour the boiling water into a heatproof measuring jug and add the bicarbonate of soda. Add the dates and give a good stir, then leave to soak for 1 hour.

To make the sponge, sift the flour and baking powder into a large mixture bowl. Rub in the butter until the mixture resembles dry breadcrumbs, then stir in the caster sugar. Drain the excess water from the dates (reserving the liquid), then gently stir the soaked dates and beaten egg into the flour mixture to form a dropping consistency (adding more of the reserved liquid if needed).

Remove the pudding basins from the fridge and divide the sponge mixture equally between them. Cover each basin with a square of aluminium foil, pleating it in the middle to allow for rising. Place in an electric steamer and steam for 40-45 minutes, until the sponge springs back when pressed.  

Tip out the individual puddings onto a plate, scraping any remaining sauce out the basins with a small spatula. Serve with vanilla ice cream (our favourite), custard or cream.


Tips

  • This is a great make-ahead recipe - make a few days ahead, then give each pudding (still in its basin) a 45-second to 1-minute (depending on wattage) blast in the microwave just before serving. Remember that heating more than one pudding at a time will take longer.
  • Any leftover puddings should be frozen as soon as possible (still in their basins). They can be reheated from frozen - 1-1½ minutes in the microwave should do it, but make sure they're piping hot all the way through before serving.

Friday, 12 May 2017

SPEEDY PITTA PIZZAS


These pitta pizzas are so quick and easy to put together, making them perfect for an after-school dinner or a weekend family lunch. If you're particularly hungry, you could cook some oven chips to serve with them or add some vegetable sticks or salad on the side.

You can use whatever toppings you like - well, any that are child-approved anyway! I've given a recipe for a simple vegetarian topping here, but have included suggestions for alternative ingredients below. My girls' favourite topping is sweetcorn and pepperoni.

My kids love to help to make these and I usually set out the prepared toppings in little bowls so they can choose whichever they want (any leftovers can be tossed into a salad). This is a good activity to do when your child has a friend over and you're not sure what toppings the visiting child likes, plus it seems to be something the kids enjoy doing and it produces a fairly minimal amount of mess.


Speedy Pitta Pizzas


Makes 2

2 white or wholemeal pittas
2 tbsp frozen sweetcorn
1 tbsp chopped red onion
¼ green pepper, deseeded and sliced
4 button mushrooms, sliced
55g grated mozzarella and Cheddar cheese

Tomato pizza sauce
1 tbsp tomato purée
2 tbsp passata
½ tsp dried oregano

Preheat the oven to 200°C/400°F/Gas Mark 6.

In a small bowl, mix together all the ingredients for the tomato pizza sauce.

Place the pittas on a baking sheet and top with the tomato pizza sauce, spreading it right to the edges. Arrange the sweetcorn, onion, green pepper and mushrooms on top, then cover with the grated cheese.

Transfer to the preheated oven and bake for 10-12 minutes, until the cheese is melted and slightly browned.


Our favourite toppings:
  • Cooked chicken, red peppers, mushrooms and sweetcorn
  • Pepperoni, green peppers, onions and black olives
  • Pepperoni and sweetcorn
  • Ham, pineapple and sweetcorn
  • Ham, mushrooms and black olives

This is a great recipe for getting some veggies into your child. Even if they're not keen on vegetable toppings, just one tablespoon of tomato purée counts as one of their five-a-day. Add vegetable crudités on the side or perhaps some sweet potato fries and you're on to a winner!

Sunday, 26 March 2017

SPAGHETTI BOLOGNESE


I find it hard to believe that I've been writing this blog for over six months and I still haven't shared my recipe for spaghetti bolognese (or "spag bol", as us Brits call it). This was my favourite meal as a child growing up in the 1980s, probably because it was one of the most exotic meals on the menu. Back in those days, spaghetti bolognese night was the only time we ever ate pasta (unless you count canned spaghetti in tomato sauce), which I find rather incredible considering how much of the stuff my own children consume!

This recipe is probably as far from a classic Italian spaghetti bolognese (or ragu) as you can get but it's the only version I can contemplate making because it's the dish of my childhood. It's not my mother's recipe, but it tastes similar (from what I can remember) even though I've made some tweaks to make it more acceptable to my own children. They are not keen on "bits" so I've learnt to grate the carrots rather than dice them, and to use passata in place of canned tomatoes for a smoother sauce - and cleaner plates!

The recipe I've given below serves four adults, but the sauce is ideal for batch cooking so the ingredients can easily be doubled, or even tripled if you have a large enough saucepan. I also use the sauce as a base for lasagne (recipe to follow another time), which is a fabulous dish to serve when you have a crowd to feed.


Spaghetti Bolognese

Serves 4

2 tsp olive oil
1 small onion, finely chopped
2 small carrots, peeled and coarsely grated (100g prepared weight)
2 garlic cloves, finely chopped
500g lean steak mince (5% fat)
1 reduced-salt beef stock cube
2 tbsp tomato purée
2 tbsp Worcestershire sauce
2 tsp dried mixed herbs (I like to use Italian seasoning)
400g passata
350g dried spaghetti
grated Parmesan cheese, to serve

Heat the oil over a low-medium heat, then add the onion and cook for 5 minutes, or until softened. Add the carrots and cook for 3 minutes. Stir in the garlic and cook for a further minute.

Increase the heat and add the mince and cook, breaking it up with a wooden spoon, until browned all over. Crumble over the stock cube and stir until thoroughly combined.

Add the tomato purée, Worcestershire sauce, herbs and passata. Season to taste with pepper. Bring to the boil, then reduce the heat to low-medium and simmer for at least 25 minutes, or until the sauce is thick and reduced.

Meanwhile, bring a large saucepan of water to the boil, then add the spaghetti and cook for 8-10 minutes, or until tender but firm to the bite. Drain and transfer to dishes along with the bolognese sauce. Serve with grated Parmesan cheese.


Tips

  • There's no reason why you couldn't add extra vegetables to the sauce - mushrooms work especially well, but finely diced red peppers or celery, or grated courgette would also make fantastic additions.
  • The bolognese sauce freezes successfully and is very useful to have to hand when you need a quick dinner. Freeze in single portions in freezerproof containers or freezer bags. Remember to label and date them - unless you enjoy playing freezer roulette!
  • When I'm cooking meals that the children will eat, I only season with pepper as I figure that some of the ingredients I use (for example, the stock cube, Worcestershire sauce and Parmesan) are salty already.

Friday, 27 January 2017

CHICKEN FAJITAS


I must admit that I'm not exactly at the forefront of culinary trends these days, but it hasn't escaped my notice that tacos are a big thing right now. In our household we don't really do tacos but fajitas have long been one of our favourites. And that got me thinking - exactly what is the difference between a taco and a fajita?

I did a little research (where would we be without Google?) and have discovered that the term fajitas (which is Spanish and translates as 'little belts') actually refers to the meat (traditionally marinated, griddled skirt steak cut into strips) rather than the dish itself. A taco on the other hand is more a method of presentation where a filling - which can be anything really - is placed on a tortilla and served either open-faced or folded. Apparently, those hard taco shells you can buy in the supermarket are not traditional in Mexico, where corn or flour tortillas are used in tacos (although the tortilla may be fried to make it crispy). The really interesting thing about all of this is that it means that a fajita can be a taco but a taco can't be a fajita - so it turns out that I've been making tacos all along!

You might not think of spicy food as family food, but actually my 5-year-old will happily eat fajitas. She doesn't like peppers or onions, so she'll have her chicken cooked in a separate pan with some sweetcorn. She enjoys making up her own fajita (or  should I say taco?), adding the grated cheese and dollops of yogurt, and rolling it up. I'm still working on the 2-year-old - she likes the tortilla, sweetcorn, cheese and yogurt so far. I think it's definitely worth persevering as I've found that other foods have been accepted eventually if I just offer them enough times.


Chicken Fajitas

Makes 4 fajitas (enough for 2 adults as a main meal)

1 tbsp vegetable oil
300g chicken breast, cut into strips
2 tbsp fajita spice (follow link for my Home-made Fajita Spice Mix)
½ green pepper, deseeded and thinly sliced
½ red pepper, deseeded and thinly sliced
1 small red onion, halved and thinly sliced
juice of ½ lime

To serve
4 flour tortillas
1 small or ½ large avocado, peeled, diced and tossed in the juice of ½ lime
55g Cheddar cheese, grated
125-g pot full-fat natural yogurt or soured cream

Heat the oil over a high heat in a large saucepan. Add the chicken strips and fry, stirring frequently, for 5-8 minutes, or until the chicken is sealed. Add 1 tablespoon of the fajita spice, stir to coat the chicken in the spice and cook for a further minute.

Add the peppers, onion and the remaining fajita spice and stir until everything is thoroughly mixed. Pour in the lime juice and continue to cook, stirring frequently, over a high heat for 5 minutes, or until the vegetables have softened and the chicken is cooked all the way through.

Divide the chicken mixture between the tortillas. Scatter over the avocado and grated cheese and top with dollops of yogurt. Fold in the two opposite ends of each tortilla, then roll up to fully enclose the filling. Cut in half and serve.


Tips
  • For beef fajitas, use strips of rump steak instead of the chicken.

Thursday, 29 December 2016

NO-BAKE WHITE CHOCOLATE & RASPBERRY CHEESECAKE


I made this cheesecake for one of our Christmas Day desserts this year (to go with the more traditional offerings of sherry trifle and Christmas pud). It proved popular with everyone so I've already decided that cheesecake will be a permanent feature of our Christmas Day menu in future. Yum!

The great thing about this recipe is that it is really easy to adapt. You don't have to use white chocolate - dark chocolate and milk chocolate work just as well - and you can also use different varieties of biscuits in the base or fruits in the topping. I chose raspberries because they're my oldest daughter's favourite fruit yet we don't have them very often, and they have the additional bonus of being a rather festive colour!

Here in the UK, this style of cheesecake with a biscuit base and cream cheese topping is probably more widely known than its baked counterpart. Not all recipes will contain chocolate in the topping but I find it a useful ingredient because it means that the topping will set without using gelatine. Besides, what recipe can't be improved by chocolate?

I haven't even mentioned the best bit yet. This recipe is so easy to make. Standing-on-your-head-with-your-hands-tied-behind-your-back easy! There's no baking involved (just a bit of gentle mixing) and it can be made in advance too. The only thing that could possibly go wrong - and I'm only mentioning this because it has happened to me - is that you could burn the chocolate when you melt it. Consider yourself warned!


No-bake White Chocolate & Raspberry Cheesecake

Serves 8-10
Biscuit base
175g digestive biscuits
75g unsalted butter, melted

Topping
225g white chocolate
150g full-fat soft cheese (I use Philadelphia)
20g caster sugar
375ml extra-thick double cream
225g fresh raspberries
white chocolate stars, to decorate (optional)

Line the base of a 20-cm round springform cake tin.

Crush the biscuits to make fine crumbs. Place in a bowl, pour in the melted butter and stir until the biscuit crumbs are thoroughly coated. Tip into the prepared tin and press down using the back of a spoon to form a base with an even thickness. Place in the fridge to chill whilst you are making the topping.

Break the chocolate into pieces and place in a heatproof bowl. Place in the microwave and heat on MEDIUM in bursts of 30 seconds, stirring in between, until melted. Set aside to cool slightly.

Put the soft cheese in a large bowl, add the sugar and mix thoroughly. Stir in the cooled melted chocolate, then gently fold in the cream. Spoon the cream cheese mixture on top of the biscuit base and smooth the surface. Return the tin to the fridge to chill for 3-4 hours, or overnight.

Run a sharp knife around the inside edge of the tin, then unclip the tin. Transfer the cheesecake to a plate and arrange the raspberries over the top. Sprinkle over the white chocolate stars to decorate, if using.


Tips
  • To crush the biscuits into crumbs, I tend to put them in a strong freezer bag and bash with a rolling pin. This is a job you can easily delegate to your kids - just keep an eye on them (mine can become a little over-zealous when it comes to bashing). You can do this using a food processor if you prefer.
  • Another way to melt chocolate is to set the bowl over a saucepan of  gently simmering water and stir regularly until melted. Just make sure that the base of the bowl doesn't touch the water and that none of the water gets into the chocolate.
  • Whichever method you use for melting the chocolate, it's best to remove the bowl from the heat source before the chocolate is fully melted as the heat of the melted chocolate should be enough to melt any remaining solid bits of chocolate. 
  • It is important to use full-fat soft cheese in this recipe because the topping won't set properly if you use a lower-fat version. It'll still taste nice though!  
  • I tend to use extra-thick double cream in this recipe for ease of use - you don't have to whip it before using, thus saving a bowl's worth of washing up! You can use regular double cream instead, but you will need to whip it until it forms very soft peaks before folding it very gently into the soft cheese and chocolate mixture.

Wednesday, 30 November 2016

CHOCOLATE REFRIGERATOR CAKE


Chocolate refrigerator cake (or tiffin, as we know it in our household) - what's not to like? It's dangerous for me to have this in the house because it's so tempting to nip to the fridge for an extra square (it goes SO well with a cup of tea), yet sadly it's hugely calorific. Luckily, this week I had a good excuse to make it because it was my birthday. And we all know that calories consumed on our birthdays don't count, don't we?

Before I had my kids, one of the things I looked forward to doing with them was baking. I have fond memories of baking cakes with my maternal grandmother and I have even more respect for the endless patience she showed my 5-year-old self now that I realise just how stressful baking with small children can be! My solution is to keep it simple by getting my kids to help with recipes that don't require precision or a light touch. Chocolate refrigerator cake is ridiculously simple to make - as the name suggests, it doesn't even need to be baked. The children can weigh the ingredients, crush the biscuits, cut up the fruit with scissors (obviously with assistance), stir everything together and press it into the tin. Oh, and lick the bowl!

The fact that this ended up looking festive (thanks to the white chocolate star sprinkles) was a happy coincidence but, as it happens, it would make a great Christmas gift. It keeps incredibly well and I've actually sent a slab of it through the post as a present on more than one occasion. It would look super pretty cut into small squares, then packed in a clear cellophane bag and tied with ribbon.

Tips
  • If you don't have a square tin, you can use a traybake tin - just make sure that it has a similar surface area.
  • To stop the golden syrup from sticking to the spoon, place the spoon in a cup of boiling water for a minute or so before using. The syrup will then slide off the spoon very easily.
  • I like to include almonds in this recipe, but they're completely optional. Aside from the allergy risk, they can be a choking hazard for small children. If you choose to leave them out, just replace with an equal weight of dried fruit.
  • This is an incredibly versatile recipe - you can use whatever biscuits and dried fruit you fancy, as long as you keep the overall weight the same.


Chocolate refrigerator cake

Makes 16 squares
100g unsalted butter, plus extra for greasing
2 tbsp golden syrup
180g dark chocolate, broken into squares (I used Cadbury's Bourneville)
200g digestive biscuits
50g glacé cherries, quartered
25g dried apricots, chopped
25g raisins
25g almonds, chopped (optional)
220g milk chocolate, broken into squares (I used Cadbury's Dairy Milk)
white chocolate star sprinkles, to decorate

Grease and line a 23-cm square cake tin.

Place the butter, golden syrup, and dark chocolate in a small saucepan over a very low heat (I use my hob's lowest setting) and melt gently, stirring occasionally.

Meanwhile, place the biscuits in a strong plastic bag and crush with a rolling pin. I like to leave some chunks and not completely pulverise the biscuits into crumbs.

Put the crushed biscuits, dried fruit and almonds into a large bowl and pour over the melted chocolate mixture. Stir well until everything is completely coated in chocolate. Tip into the prepared tin and, using the back of a spoon, press down to cover the base completely. Transfer to the fridge and chill for at least 10 minutes.

Melt the milk chocolate, either in the microwave or in a heatproof bowl set over a saucepan of gently simmering water. Pour the melted chocolate into the tin and spread it out to form a thin layer over the biscuit base. Scatter over the sprinkles.

Return the tin to the fridge and chill until set. Remove the tiffin from the tin and cut into squares using a large heavy-bladed knife.

Images and text © Louisa Smith

Sunday, 27 November 2016

PAELLA-STYLE RICE


I hesitate to call this recipe 'paella' after Jamie Oliver got so much stick about the paella recipe that he tweeted recently (a lot of which seemed to concern his inclusion of chorizo). However, since 'rice with whatever' isn't a particularly catchy recipe title, I hope that calling it 'paella-style rice' will be acceptable to any Spanish readers. I've been lucky enough to visit Spain a few times (I've even eaten paella there!) but I shan't pretend that I know much about traditional paella. I've flagrantly disregarded most of the few rules that I do know about paella-making (i.e. that you should use Spanish rice; that, unlike risotto, you mustn't stir the rice while it's cooking; and that paella shouldn't contain chorizo) so I won't make any claims on the authenticity of this recipe. If anything, I'd say it's a British take on paella. Which is fine by me as it's pretty tasty, if I do say so myself!

While I'm being honest, I'll admit that this isn't a meal I'd give my kids at the moment. I hope it will be something they'll eat when they're a bit older, but they're currently going through a no-mixed-foods phase and my 5-year-old doesn't even like the different foods touching each other on the plate!

Tips
  • I've used turmeric in place of the more traditional saffron simply because of the price. If you prefer to use saffron, soak the strands in a little of the stock and add along with the stock and passata.
  • This dish can be reheated successfully the following day but do make sure that you cool down the leftovers as quickly as possible and promptly transfer them to the fridge, then reheat until piping hot all the way through. 


Paella-style rice

Serves 2 adults

½ tbsp olive oil
1 small onion, finely chopped
70g diced chorizo
175g chicken breast, cut into chunks
100g basmati rice
½ tbsp ground turmeric
½ tbsp smoked paprika
½ red pepper, deseeded and diced
2 garlic cloves, peeled and finely chopped
200g passata
200ml chicken stock
150g cooked king prawns, defrosted if necessary
2 tbsp chopped fresh parsley
120g frozen peas
1 fresh red chilli, deseeded and finely chopped

Heat the oil in a large saucepan over a low-medium heat and cook the onions gently for 5 minutes. Add the chorizo and cook for a further 2 minutes, then add the chicken, increase the heat to medium and cook, stirring, for 3-4 minutes, until sealed all over.

Add the rice, turmeric and paprika and stir until all the ingredients are coated in the spices. Stir in the red pepper, garlic, passata and stock. Bring to the boil, then reduce the heat to low, cover and cook for 12 minutes, without lifting the lid.

Remove the lid and stir in the prawns, parsley, peas and chilli. Continue to cook over a low heat for 3-4 minutes, or until the prawns and peas are piping hot.

Thursday, 3 November 2016

CLASSIC FISH CAKES


We all know that fish is good for us, but any parent will tell you that such a logical argument is unlikely to induce a picky child to eat it! These fish cakes are a great way to introduce fish to reluctant fish eaters. They are admittedly a bit of a faff to make but their saving grace is that they can be prepared ahead of time. Conveniently combining fish and potatoes, they are also freezable and are therefore perfect to have at hand for a quick and easy supper.

I generally use cod in this recipe but you could use any white fish. In a bid to persuade my daughter to eat oily fish, I've tried making these fish cakes with half cod and half salmon and I think that combination is pretty tasty. (My daughter rumbled me but still ate a fair amount so I am undeterred!) Of course, some kids will object to 'the bits' (parsley) but you could simply leave that out.


Classic fish cakes

Makes 12 fish cakes
1 lemon
500g skinless, boneless cod fillets
500g potatoes (peeled weight), cut into large chunks
2 tbsp chopped fresh flat-leaf parsley (optional)
40g plain flour
2 eggs, beaten
85g dried natural breadcrumbs or panko
3 tbsp vegetable oil

Preheat the oven to 180°C/350°F/Gas Mark 4.

Finely grate the rind of the lemon and set aside. Place the cod fillets in a large ceramic baking dish and squeeze over the juice from the lemon. Cover the baking dish with foil, transfer to the preheated oven and bake for 1520 minutes, or until the fish is cooked through and flakes easily. Allow to cool slightly, then flake the fish into a large mixing bowl, keeping the chunks nice and big.

Meanwhile, cook the potatoes in a saucepan of lightly salted boiling water for 20 minutes, or until tender. Drain and mash thoroughly (this is the one occasion I dust down my potato rice), then add to the fish in the mixing bowl.

Add the reserved grated lemon rind, the parsley and freshly grated pepper to taste. Stir gently to combine the ingredients; do not mix too vigorously because you don't want to break down the fish chunks. Cover the bowl and transfer to the fridge to chill before you shape it into fish cakes - 15 minutes will do but you can leave it longer (even overnight) if you prefer.

When you're ready to shape the fish cakes, place the flour, eggs and breadcrumbs into separate shallow dishes. Line a large baking tray with a baking paper.

Remove the fish mixture from the fridge and divide into 12 equal portions. I do this by packing a 1/3-cup measuring cup with the mixture (don't worry - it easily pops out again when held upside down and given a sharp tap on the base). Form each portion into a patty shape (approximately 2.5 cm thick) and roll it in the flour, then place it on the prepared baking tray. Finally, roll each patty first in the egg and then in the breadcrumbs to cover it completely and return to the baking tray. At this stage, it is a good idea to chill the fish cakes for at least 10 minutes because this will help them keep their shape when cooking.

Heat 2 tablespoons of the oil over a medium heat in a large frying pan. Add half the fishcakes and fry on one side for 34 minutes, or until sealed and golden brown. Flip over the fish cakes and cook for a further 34 minutes on the other side. Finally, turn the fishcakes on their sides to brown the edges, giving them a 60 degree turn every minute or so and continuing until browned all the way around. Keep the fish cakes warm in a low oven whilst you fry the rest using the remaining tablespoon of oil.

Serve the fishcakes with vegetables and a dipping sauce of your choice.


Tips

  • I've tried making these using fish from the freezer aisle in the supermarket but it was an abject failure - they were too watery and it resulted in a mixture that was a sticky mess! Therefore, I'd advise saving the frozen fish for fish pie or curry and using fresh fish for these fish cakes.
  • I'm a big fan of panko (Japanese-style breadcrumbs) for a crunchy topping on things like pasta bakes but prefer the finer texture of traditional dried breadcrumbs for fish cakes. Either will work fine though. 
  • Breadcrumbing (or panéing) can generate a lot of mess. I tend to coat all the fish cakes in the flour first, then one by one roll them in the egg and breadcrumbs, using one hand for the egg and the other for the breadcrumbs. It saves me from breadcrumbing my fingers!
  • If you want to freeze the fish cakes, do so before frying them. Open-freeze on the baking tray, then wrap individually in clingfilm and pack into a freezerproof container. Defrost fully before frying.
  • This recipe yields 12 equal-sized fish cakes but you may prefer to make smaller fish cakes for the kids and/or larger ones for adults. If so, bear in mind that you will need to adjust the quantities of flour and breadcrumbs accordingly.

Monday, 10 October 2016

CLASSIC MACARONI CHEESE


Macaroni cheese is a staple meal in our household. My eldest daughter ranks it as her joint #1 meal (along with fish and chips) and my husband is a massive fan too since it was his favourite dinner as a child. Therefore, I thought it was about time that I shared my recipe for a classic macaroni cheese. I've called it 'classic' because it is a fairly basic version that could easily be adapted to include other ingredients. I like to mix in cauliflower and broccoli florets, and my family enjoys it with sweetcorn and ham. To be honest, I don't always add the crunchy topping because the kids are often screaming (literally!) for their dinner and don't want to wait the extra five minutes it'll take to sort this out. It is a nice addition on those occasions when mealtimes aren't quite so fraught though.

I feel I should apologize for posting yet another pasta recipe but the truth is that my family eats a LOT of pasta. I have to make a conscious effort to limit pasta to just three dinners a week, such is my small girls' appetite for the stuff! I am yet to meet a child that doesn't like pasta (although I'm certain they must exist) but when I was growing up in the 1980s we only ever had pasta as spaghetti Bolognese and canned spaghetti in tomato sauce. I often wonder how my mother coped without this fantastic fallback ingredient, which is so cheap, easy to store, quick to cook, and versatile.

For ages, I didn't think I could make cheese sauce I remember using cheese sauce granules that you mixed with boiling water when I was a student. It was pretty artificial-tasting! I finally got the hang of making cheese sauce when I was cooking baby purées for my oldest child  she developed a taste for a particular purée that was made from cheese sauce mixed with mashed cod and vegetables, which I ended up making countless times. I discovered that warming up the milk before adding it to the butter and flour mixture made the process a lot easier, not to mention quicker, and I've never looked back!


Classic macaroni cheese

Serves 2 adults and 2 children (generously)
300g dried macaroni

Cheese sauce
30g butter
30g plain flour
300ml full-fat milk
good pinch of freshly grated nutmeg
90g vegetarian extra-mature Cheddar cheese, grated

Crunchy topping
20g natural dried breadcrumbs (I like to use panko)
30g vegetarian extra-mature Cheddar cheese, grated

Bring a medium-sized saucepan of water to the boil. Add the macaroni, bring back to the boil and simmer for 1012 minutes (I find that macaroni takes longer to cook than other pasta shapes), until tender but firm to the bite.

Make the cheese sauce while the macaroni is cooking. Put the butter in a small saucepan and melt over a lowmedium heat. Pour the milk into a jug and microwave for 2 minutes to warm through. Once the butter is bubbling, add the flour, stir to make a paste and allow to bubble for 1 minute. Start adding the warmed milk to the butter and flour mixture, a little at a time, stirring vigorously until each addition has been incorporated. To start with, the mixture will form into a lump but just keep stirring frequently and once you've added enough milk it will transform into a smooth sauce. When you have added all the milk, increase the heat to medium and continue to cook, stirring frequently, for a further 2 minutes. Remove the pan from the heat and add the nutmeg and cheese, then stir until the cheese has melted and the sauce is smooth.

Meanwhile, preheat the grill to medium.

Drain the macaroni and tip it into the saucepan containing the cheese sauce. Stir until the pasta is thoroughly coated in the sauce. Transfer to a 1.5-litre baking dish.

Mix together the breadcrumbs and the remaining cheese, then scatter over the macaroni and cheese sauce. Place under the preheated grill and cook for 5 minutes, or until the topping is golden brown. Serve with freshly cooked vegetables (frozen sweetcorn and peas are our favourites) on the side.
    

Wednesday, 5 October 2016

SPICY SAUSAGE PASTA


When I started this blog, I posted a recipe for tomato sauce and promised to share some of the recipes I make using it. I haven't done so up to now (but, come on, it's only been a month!) so I thought it was time to rectify that situation. Today I'm going to share a recipe that is one of our family favourites and  surprise surprise  it's another pasta recipe! If you use previously made tomato sauce from the freezer (or a jar of ready-made tomato pasta sauce) to make this recipe, it can be on the table in around 20 minutes, which I think is pretty good going.

This is one of those recipes that can be spiced to suit everyone's tastes. The fennel seeds add an aromatic aniseed flavour that is not so pungent that my kids object to it and the chilli flakes are only added right at the end, making them completely optional  I just sprinkle them over the adults' portions. (Do be careful  last time I made this, I forgot to check whether the jar had shaker holes before I tipped it over my pasta. It didn't. Cue half a pot of chilli flakes over my pasta, half of which then had to be chucked in the bin. I like spicy food but even I could not handle that much heat!)

A word on ingredients - you MUST use good-quality sausages with a high meat content (80% or higher) for this recipe. I've tried it with cheaper sausages and, frankly, it's a waste of sausages  they don't brown in the same way as the premium ones and the result is seriously unappetizing. You have been warned!

The quantity given below would easily feed four adults, although in our house it feeds two adults and two kids for dinner with enough leftover for my husband's lunch the next day.


Spicy sausage pasta

Serves 4
400g good-quality pork sausages (80% or higher meat content)
½ tbsp fennel seeds
400g tomato sauce, defrosted if frozen
320g dried pasta shapes (I like to use penne or fusilli)
pinch of crushed chilli flakes (optional)

Separate the sausages and squeeze the meat from the casings. Set aside.

Put the fennel seeds in a mortar and grind with a pestle. They don't need to be ground too finely  just enough to break them down slightly and release their aroma. Set aside.

Heat a large frying pan over a high heat, then add the sausage meat and cook, breaking down with a wooden spoon as you would with mince, until the sausage is cooked through and browned slightly. Add the ground fennel seeds and cook, stirring, for 1 minute. Add the tomato sauce and bring to the boil, then reduce the heat slightly and simmer for 5 minutes.

Meanwhile, bring a large saucepan of water to the boil. Add the pasta and back bring to the boil, then reduce the heat slightly and simmer for 810 minutes, or until tender but firm to the bite.

Drain the pasta well, then add to the contents of the frying pan and stir gently to combine with the sauce. Transfer to serving plates and sprinkle over crushed chilli flakes to taste (if using).

Monday, 26 September 2016

CHICKEN & CHORIZO QUESADILLAS

This past weekend I seem to have come over all Mexican, what with fajitas (recipe to follow another time) for dinner on Friday, chilli con carne (recipe here) on Saturday and quesadillas for lunch on Sunday. It wasn't planned it just happened like that!

Quesadillas make a really tasty a weekend lunch. The great thing is that you can vary the fillings to suit each person  for example, my husband doesn't like the spring onion so I'll leave it out of his tortilla, and the kids don't like the spring onion or red pepper but will have extra sweetcorn instead. The recipe below is for my favourite version but feel free to swap and change the filling ingredients to suit your own tastes (chopped fresh chillies and coriander make nice additions). The only thing I would say is that some kind of cheese is pretty essential as it 'glues' the two halves of tortilla together.

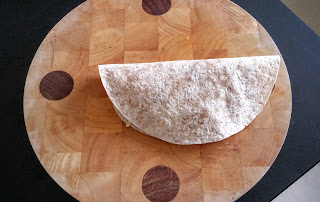
I guess I make my quesadillas in a fairly unconventional way because they're usually made by sandwiching the filling between two tortillas, whereas I fold each tortilla in half. I like my method because I find it easier to flip the individual tortillas, plus I think they hold together better when you're eating them too.


Everyone in my family likes to have something to dip their quesadilla into so I'll serve natural yogurt (which is lower in fat than soured cream) and occasionally some guacamole alongside. PLEASE NOTE that however many quesadillas you think you need, I'd highly recommend adding one more. We usually manage to get through five between the four of us and that's bearing in mind that the toddler only has half of one!


Chicken & chorizo quesadillas

Makes 2
2 flour tortillas
80g ready-grated Cheddar and mozzarella (sometimes called 'pizza cheese')
40g red pepper, diced
2 spring onions, chopped
30g frozen sweetcorn, thawed
30g diced chorizo
40g cooked chicken breast, shredded
vegetable oil, for brushing
natural yogurt, to serve

Place the first tortilla on a flat surface (such as a chopping board or the worktop). Sprinkle 20g of the cheese over one semi-circular half of the tortilla, leaving a small gap around the edge. Scatter half of the red pepper, spring onion, sweetcorn, chorizo and chicken over the cheese-topped side of the tortilla, then top with another 20g of the cheese. Fold the tortilla in half to cover the filling. Repeat with the second tortilla and the remaining filling ingredients.

Brush a frying pan large enough to hold both tortillas (I use a 24-cm saut̵é pan) with oil and place over a mediumhigh heat. Once hot, place the tortillas into the pan with both folded edges in the centre. Cook for 34 minutes, or until golden brown underneath. Carefully turn each tortilla using a fish slice and cook on the other side for a further 23 minutes.

Transfer the quesadillas to a chopping board and cut into wedges (I find it easiest to use a pizza wheel to do this). Serve with natural yogurt for dipping.

Sunday, 25 September 2016

CHILLI CON CARNE


Chilli con carne might seem like an odd meal to give to children, but this is actually a fairly mild version and my kids certainly don't seem to find the spiciness off-putting if I'm perfectly honest, they object more to the red pepper! If I'm cooking for both adults and kids, I tend to keep the chilli con carne fairly mild but serve it with crushed chilli flakes alongside, so anyone who wants their portion to have extra heat can add the chilli flakes at the table.

We went to the South Devon Chilli Farm recently and the chilli con carne they were serving in their café included dark chocolate in its ingredients. I really fancy trying that out at home sometime. My husband tried the stuff at the chilli farm and said he couldn't really taste the chocolate but presumably it's supposed to add an extra depth of flavour. What do you think? Has anyone been brave enough to try this? I've tried a few different brands of dark chocolate with chilli and I quite liked them, in a weird kind of way, so I definitely think it's a flavour combination that works.

Chilli con carne is a great meal to cook for a crowd. Even if I'm just cooking for the four of us, I usually make a double batch because it freezes well. I find that using mince is an economical way to make meat-based meals but if you want to stretch out the meat even further simply add more beans  chickpeas are a nice addition.

There are loads of ways to serve beef chilli  whether with rice, spooned over tortilla chips for nachos, or as a filling for tortillas. We love to eat ours with avocado, natural yogurt and grated cheese on the side.


Chilli con carne

Serves 4
½ tbsp vegetable oil
1 onion, chopped
2 garlic cloves, chopped
1 red chilli, deseeded and chopped
½ tbsp ground cumin
½ tbsp paprika
½ tsp mild chilli powder
450g lean beef mince
1 reduced-salt beef stock cube
150ml water
250g passata or canned chopped tomatoes
1 tbsp tomato purée
1 tbsp dried oregano
1 bay leaf
200-g can red kidney beans, drained and rinsed

Pour the oil into a large saucepan and place over a lowmedium heat. Once hot, add the onion and cook for 8 minutes, until softened. Add the garlic and red chilli and cook for a further minute, then stir in the spices.

Meanwhile, place another large saucepan over a mediumhigh heat. Add the beef and dry-fry, breaking up with a wooden spoon, until the meat is browned all over. Crumble over the stock cube and stir well.

Add the browned beef to the onion mixture. Add the water, passata, tomato purée, oregano and bay leaf and stir to combine well. Bring to the boil, then reduce the heat slightly and simmer for at least 30 minutes. Add the kidney beans and cook for a further 15 minutes. If the mixture seems runny, continue to simmer until reduced. Remove and discard the bay leaf. Tuck in!

Tuesday, 13 September 2016

PASTA WITH PESTO, HAM & PEAS

Following hot on the heels of my basil pesto recipe is this recipe for my family's favourite way to eat it. It's so simple - literally a four-ingredient, 15-minute meal. What's more, I'm guaranteed clean plates all round when I serve this up (which, frankly, makes a nice change).

Meals containing peas go down well in my house. Along with sweetcorn, peas are a vegetable that everyone will happily eat – my husband even goes as far as to call the humble pea 'the king of vegetables'. It's a shame that kale and broccoli don't receive similar praise, but I'm just happy that everyone's in agreement about something.   

I tend to leave the ham out of my toddler's portion because I try to limit her salt intake, but that's easy enough – I just serve hers up before I add the ham to the rest of the pasta. Occasionally, I'll make a vegetarian(ish – the Parmesan in the pesto obviously isn't vegetarian) version of this dish for myself with added halved cherry tomatoes and fresh rocket leaves instead of the ham and peas. You can also use bacon, or even chicken, instead of the ham. In fact, the possibilities are endless. I'd love to hear your ideas for jazzing up pesto pasta – what are your family's favourite ingredients?


Pasta with pesto, peas & ham

Serves 2 adults and 2 small children
300g (dry weight) pasta shapes
200g frozen peas
100g basil pesto
100g ham (slices are fine), chopped
Bring a large saucepan of water to the boil and add the pasta. Bring back to the boil, then reduce the heat and simmer, stirring occasionally, for 8 minutes. Add the peas, bring back to the boil and simmer for a further 2 minutes, or until the pasta is tender but firm to the bite.
Drain the pasta well, then return to the saucepan and stir in the pesto and ham. Dig in!

Monday, 5 September 2016

BASIC TOMATO SAUCE


For my first ever post (drum roll please!) I'd like to share my all-time most useful recipe - tomato pasta sauce. I just HATE to be without a batch of this in my freezer. I use it as a base to make all kinds of pasta dishes with just the addition of a few extra ingredients.

The sauce itself is pretty versatile too – you can omit the carrot and celery for a richer, more tomatoey (is that even a word?) sauce or add extra veg (such as fennel, courgettes and peppers) to make it taste even more virtuous. It also helps me sneak in vegetables that my kids wouldn’t even look at in their fresh state.

My kids (and husband) prefer a smooth sauce so I’ll whizz it up in the pan using a stick blender just before serving, but you can leave yours chunky if you prefer.
Today I’m just sharing the basic recipe, but I will definitely return to this to fill you in on other ways to use and adapt this true mother of a sauce.
I’ve given quantities below for a single batch but I ALWAYS make three or four times this amount in one go – after all, the beauty of this sauce is that it can be frozen. I tend to freeze the finished sauce in portions of 375g, which I find is plenty to add to 300g (dry weight) pasta to feed a family of four. If there are any smaller amounts of (not previously frozen) sauce leftover, I put them in small pots and freeze for the odd day when the kids are eating dinner on their own.

I use a supermarket basics range for the tomatoes; there’s probably a bit more juice in the can than you get with premium brands but, other than that, I honestly can’t tell the difference.

Basic tomato sauce

Makes approximately 425g
1 small onion
1 carrot
1 celery stick
1 garlic clove
1 tsp olive oil
400g canned chopped tomatoes
1 tsp dried oregano
1 bay leaf
½ tsp sugar

First, prepare the vegetables. Peel the onion and carrot and chop into fairly small dice. Trim the celery and run a vegetable peeler along its length to remove the strings, then chop into the same size dice as the onion and carrot. Peel and chop the garlic.
Heat the oil in a saucepan, then add the onion and cook for about 10 minutes, until softened. Add the carrot, celery and garlic and continue to cook for a further 10-15 minutes, until really soft. It’s important not to rush this stage; if the vegetables start sticking to the bottom of the pan, reduce the heat and partially cover with a lid so that the vegetables begin to sweat.
Add the tomatoes, oregano, bay leaf and sugar, increase the heat and bring to the boil. Reduce the heat and simmer for 30 minutes (or longer if you have time), until the sauce is thick and reduced. Remove and discard the bay leaf. If desired, blend in the pan using a stick blender until smooth.

* Freeze any leftover sauce in freezerproof containers. To defrost, either remove from the freezer and leave out on the side until fully defrosted or, if you forget to do this, pop the container minus lid into the microwave and heat on LOW for short bursts, stirring in between, until defrosted.