Showing posts with label VEGETARIAN. Show all posts

Sunday, 26 November 2017

STICKY TOFFEE PUDDINGS


Ever since the days started getting colder and darker (boo!), I've been craving warming, comforting foods. I'm loving roast dinners at the moment, especially since the girls have finally decided that they quite like them too. Isn't it a great feeling when kids suddenly decide - after months or even years of shunning a certain food or meal - that they DO like it after all? Of course, they might change their notoriously fickle minds again next week so I'll make the most of this while I can!

As far as I'm concerned, a roast dinner simply must be followed by a decadent pud, and you can't get much more decadent than a classic sticky toffee pudding. My version is made using individual basins and it is steamed to make the most deliciously moist, self-saucing puddings. And with Christmas Day being just four weeks away tomorrow (sorry to remind those of you who are still in denial), these mini puddings would make a great prepare-ahead alternative to the traditional Christmas pudding if, like me, you're not a fan.

Before I had kids to cater for, making cakes and desserts was my absolute favourite kind of cooking but, with less free time and more focus on healthy family meals, I've found myself doing less baking in recent years. I'd actually forgotten how easy this recipe is - sure, there are a few stages involved but none of them is especially difficult.  It's a great recipe to try when you have a little time to potter around in the kitchen.

I love the fact these desserts are portion-controlled (a single pudding will easily feed two children or one hungry grown-up) and any leftover puds can be whacked in the freezer for another day. Call me boring, but feeding my freezer makes me very happy!
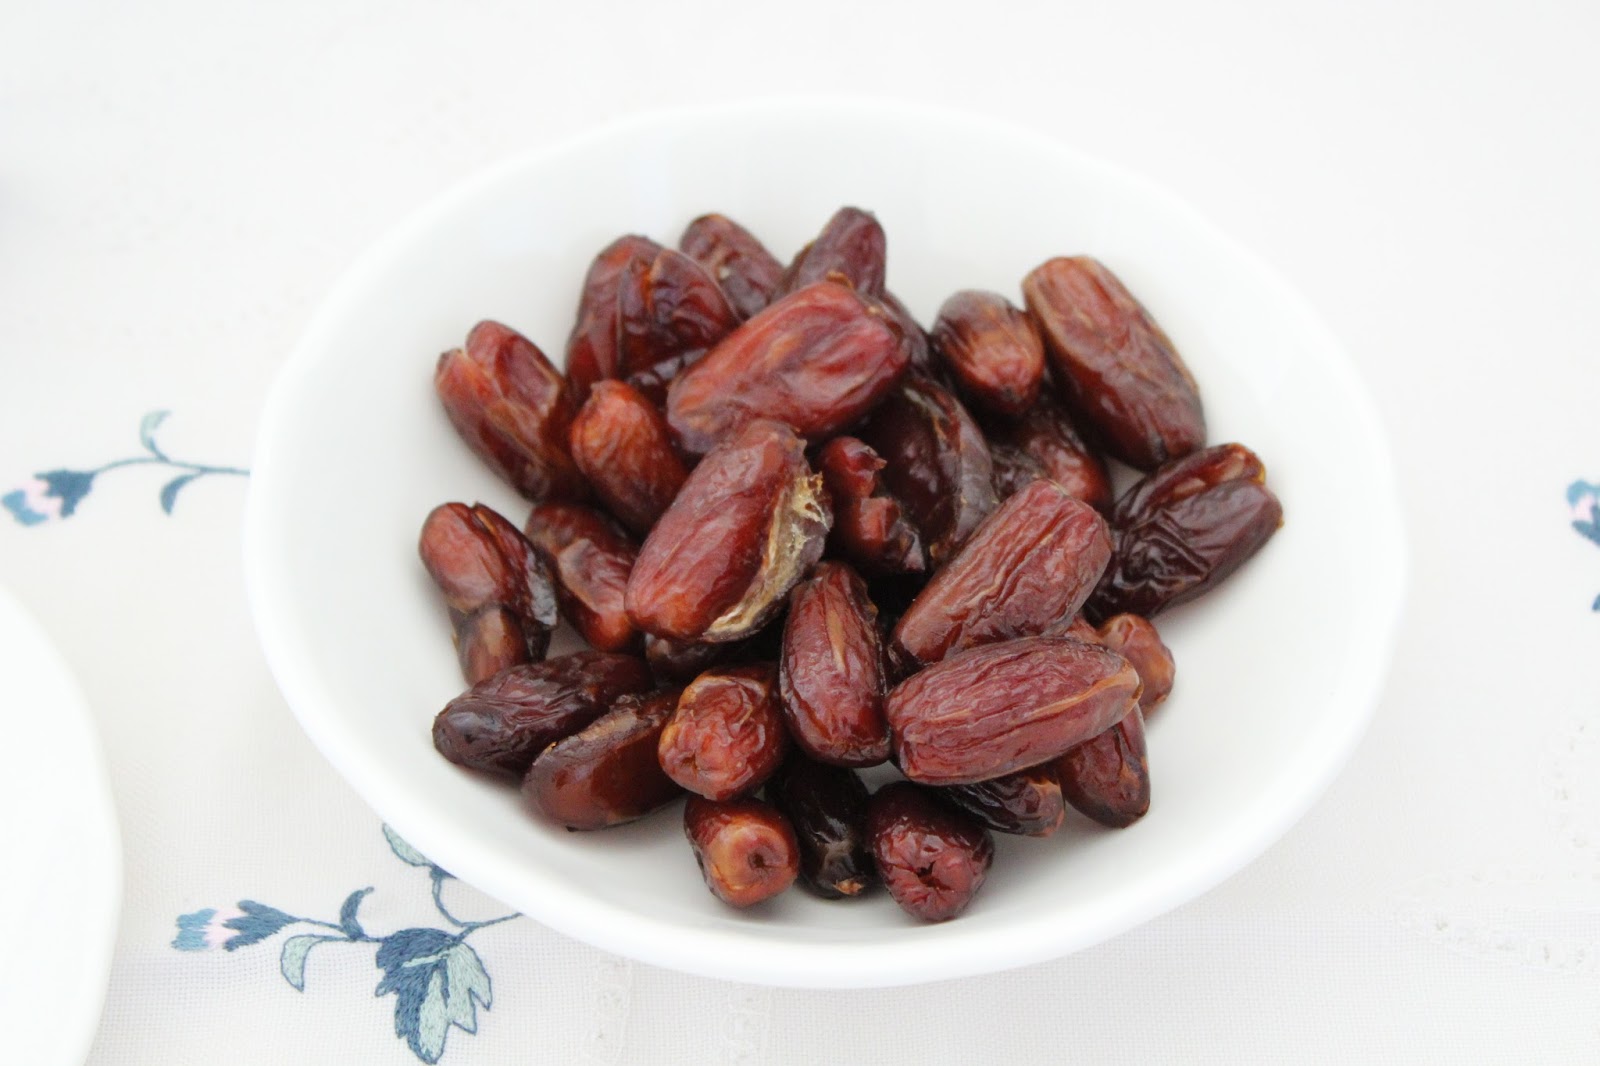


Sticky Toffee Puddings

Makes 6

150ml boiling water
½ tsp bicarbonate of soda
125g dates, chopped
175g plain flour
2 tsp baking powder
40g cold unsalted butter
125g caster sugar
1 large egg, beaten

Toffee sauce
140g dark muscovado sugar
85g unsalted butter
4 tbsp (60ml) double cream

vanilla ice cream, custard or cream, to serve

To make the toffee sauce, put the muscovado sugar, butter and cream into a small saucepan over a low-medium heat. Stir until the butter has melted and the sugar has dissolved, then gently bring to the boil. Divide the sauce equally between six 150-ml non-metallic pudding basins and transfer to the fridge for at least 1 hour. The sauce needs to set a little before you add the sponge mixture on top.

Meanwhile, pour the boiling water into a heatproof measuring jug and add the bicarbonate of soda. Add the dates and give a good stir, then leave to soak for 1 hour.

To make the sponge, sift the flour and baking powder into a large mixture bowl. Rub in the butter until the mixture resembles dry breadcrumbs, then stir in the caster sugar. Drain the excess water from the dates (reserving the liquid), then gently stir the soaked dates and beaten egg into the flour mixture to form a dropping consistency (adding more of the reserved liquid if needed).

Remove the pudding basins from the fridge and divide the sponge mixture equally between them. Cover each basin with a square of aluminium foil, pleating it in the middle to allow for rising. Place in an electric steamer and steam for 40-45 minutes, until the sponge springs back when pressed.  

Tip out the individual puddings onto a plate, scraping any remaining sauce out the basins with a small spatula. Serve with vanilla ice cream (our favourite), custard or cream.


Tips

  • This is a great make-ahead recipe - make a few days ahead, then give each pudding (still in its basin) a 45-second to 1-minute (depending on wattage) blast in the microwave just before serving. Remember that heating more than one pudding at a time will take longer.
  • Any leftover puddings should be frozen as soon as possible (still in their basins). They can be reheated from frozen - 1-1½ minutes in the microwave should do it, but make sure they're piping hot all the way through before serving.

Sunday, 27 August 2017

BANANA COLADA


Here's a little something to help celebrate the Bank Holiday weekend! It's been a scorcher here in south-west England today and we've spent the day out in the garden - my husband even brought out the barbecue for what I think was only the second time this year. And when you're relaxing in the great outdoors what can be better to cool you down and chill you out than a cool, refreshing cocktail?

This recipe was inspired by a cocktail I enjoyed on my honeymoon in the Caribbean. It's basically just a Piña Colada blended with banana but it must have been good because I can still remember the taste now, 12 years later! Don't you just love food memories like that?

I think the original recipe used coconut cream so I've attempted to slim it down a little by using a combination of reduced-fat coconut milk and coconut water. The great thing about it is that the kids (or any non-drinkers) don't have to feel left out - simply leave out the rum you're left with a delicious non-alcoholic smoothie. I always add the rum last anyway so I can remove a portion for the kids first, if they want some (they're not big smoothie drinkers but they seem to always want a taste of any smoothies I make).


Banana Colada

Serves 2

1 large banana
160g frozen pineapple chunks
200ml reduced-fat coconut milk
200ml coconut water
50ml coconut-flavoured white rum (optional)
desiccated coconut, to decorate

Put the banana and pineapple in a blender with the coconut milk and coconut water and process until smooth. Add the rum, if using, and process briefly. Pour into glasses, sprinkle over the desiccated coconut and serve.


Tips
  • I used frozen pineapple in this recipe because I like to use at least one frozen ingredient in a smoothie or cocktail to make it nice and cold. Frozen pineapple is also super convenient as it spares you from having to prepare a fresh pineapple, which can be messy and time-consuming. That said, I've only recently discovered frozen pineapple in the supermarket so if yours doesn't stock it, there's no reason why you couldn't use fresh, or even tinned, pineapple.
  • If you're using frozen fruit, please be aware that not all blenders will be able to cope with rock solid ingredients. Ideally, you need to use a blender with a powerful motor that's capable of crushing ice - this has the advantage of giving the finished smoothie a velvety-smooth finish too. Alternatively, allow the frozen ingredients to partially defrost before blending them.

Thursday, 10 August 2017

COUSCOUS SALAD WITH ROAST SUMMER VEGETABLES


Packed lunches are a bit of a necessity when you're out and about with kids - they want to eat when they want to eat (waiting for it to be cooked is not an option) and what they want to eat (whether it's on the menu or not). As a result, my family eats a LOT of picnics at this time of year. Not that I'm complaining - even the simplest of lunches tastes amazing eaten in the great outdoors, especially if you've been active enough to work up an appetite beforehand. While my kids are more than happy with a sandwich or wrap, I like to change things up and will often take along a salad for my lunch. This couscous salad is a current favourite - it tastes just as good cold as it does hot, it is full of flavour, and it is robust enough to withstand transportation.

As well as being a great picnic dish, it would make a fantastic accompaniment to grilled meat (especially lamb skewers) at a barbecue, and I'm looking forward to trying it with grilled halloumi the next time I make it. This quantity of couscous salad will serve four as a light lunch or six as a side dish.


Couscous Salad with Roast Summer Vegetables

Serves 4-6

Roast summer vegetables
1 red pepper
1 yellow pepper
2 small red onions
2 courgettes
8 garlic cloves (optional)
2 tbsp olive oil
1 tsp dried oregano

Couscous
250g couscous
1 tsp each ground cumin, ground coriander and paprika
4 spring onions, finely sliced
325ml hot vegetable stock
juice and grated rind of 1 lemon
300-g can chickpeas, drained and rinsed

ground black pepper

Preheat the oven to 200°C/400°F/Gas Mark 6.

First, prepare the vegetables. Deseed the peppers and cut the flesh into 2.5-cm chunks. Peel the onions, removing any roots but keeping the root ends intact. Slice each onion in half through the root, then cut each half into four wedges through the root so the layers don't separate. Trim the ends off the courgettes. If the courgettes are thick, cut them in half lengthways before cutting them into 1-cm-thick slices. Finally, break the garlic cloves, if using, from the bulb but do not remove the papery skins.

Put all the vegetables in a large food bag, pour in the oil and add the oregano and pepper to taste. Holding the top firmly, shake the bag until the vegetables are thoroughly coated in the oil and seasonings. Tip the contents of the bag into a large roasting tin. Transfer to the preheated oven and bake, stirring occasionally, for 30-35 minutes, or until the vegetables have softened and the edges are brown in places.

Meanwhile, prepare the couscous. Put the couscous into a large heatproof bowl and stir in the spices and spring onions. Pour in the hot stock, then cover and leave to stand for at least 5 minutes. Fluff up the grains with a fork, then stir in the lemon juice, lemon rind, chickpeas and pepper to taste.

Remove the roast vegetables from the oven and leave to cool down for a few minutes, then add to the couscous and gently stir through. Serve immediately or leave to cool down slightly and transfer to the fridge - this couscous salad is delicious eaten hot or cold.


Tips
  • To eat the garlic, simply squeeze the soft pulp out of the papery skin. Roasting garlic like this mellows the flavour, making it almost sweet and not at all pungent.

Saturday, 10 June 2017

SUPER GREEN SMOOTHIE


Smoothies are a super way to pack lots of nutrients into your diet. I tend to avoid taking in too many calories in drink form (unless we're talking wine) but I've been doing lots of running recently and have been enjoying the occasional smoothie as a post-workout snack.  I also find them to be a good breakfast option on mornings when I don't feel like eating anything too heavy or if I simply fancy a change from cereal.

Green smoothies have been around for some time but, to be honest, I've never really fancied trying them because they seem just too, well, healthy. Despite its vibrant green colour (no getting that past my kids!), I think this version is the perfect introduction to green smoothies as the sweetness of the banana and mango completely masks the taste of the kale, which can otherwise be quite bitter.

My girls aren't big smoothie (green or otherwise) drinkers but my 6-year-old was intrigued enough to try this - she even said "that's nice, Mummy", although she declined to have her own glass. I'm taking that as a partial success!


Super Green Smoothie

Serves 1

½ banana, peeled
60 g frozen mango
45 g frozen kale
225-250 ml coconut water

Put the banana, mango and kale in a blender with 225 ml of the coconut water and process until smooth. Check the consistency - it will be fairly thick, so stir in the remaining coconut milk if you prefer a runnier smoothie.

Tips

  • I've used frozen mango and kale in this recipe but you can, of course, use fresh - it's just quite nice to include frozen ingredients in a smoothie because they'll make it nice and cold.
  • Frozen fruit and vegetables are super-convenient - let's face it, preparing a mango can be a bit of a faff, and with frozen fruit that's all done for you. Using frozen also helps me to prevent wastage because my family is not keen on greens and I'd struggle to get through a whole big bag of kale on my own. With the frozen stuff, I just take out what I need and put the rest back in the freezer for another day.
  • That said, if you're using frozen fruit or vegetables in a smoothie, please be aware that not all blenders will be able to cope with rock solid ingredients. The stick blender I've been using for my smoothies is definitely on its way out! Ideally, you need to use a blender with a powerful motor that is advertised as being capable of crushing ice - this has the advantage of giving the finished smoothie a velvety-smooth finish too. Alternatively, allow the frozen ingredients to partially defrost before blending them.

Friday, 12 May 2017

SPEEDY PITTA PIZZAS


These pitta pizzas are so quick and easy to put together, making them perfect for an after-school dinner or a weekend family lunch. If you're particularly hungry, you could cook some oven chips to serve with them or add some vegetable sticks or salad on the side.

You can use whatever toppings you like - well, any that are child-approved anyway! I've given a recipe for a simple vegetarian topping here, but have included suggestions for alternative ingredients below. My girls' favourite topping is sweetcorn and pepperoni.

My kids love to help to make these and I usually set out the prepared toppings in little bowls so they can choose whichever they want (any leftovers can be tossed into a salad). This is a good activity to do when your child has a friend over and you're not sure what toppings the visiting child likes, plus it seems to be something the kids enjoy doing and it produces a fairly minimal amount of mess.


Speedy Pitta Pizzas


Makes 2

2 white or wholemeal pittas
2 tbsp frozen sweetcorn
1 tbsp chopped red onion
¼ green pepper, deseeded and sliced
4 button mushrooms, sliced
55g grated mozzarella and Cheddar cheese

Tomato pizza sauce
1 tbsp tomato purée
2 tbsp passata
½ tsp dried oregano

Preheat the oven to 200°C/400°F/Gas Mark 6.

In a small bowl, mix together all the ingredients for the tomato pizza sauce.

Place the pittas on a baking sheet and top with the tomato pizza sauce, spreading it right to the edges. Arrange the sweetcorn, onion, green pepper and mushrooms on top, then cover with the grated cheese.

Transfer to the preheated oven and bake for 10-12 minutes, until the cheese is melted and slightly browned.


Our favourite toppings:
  • Cooked chicken, red peppers, mushrooms and sweetcorn
  • Pepperoni, green peppers, onions and black olives
  • Pepperoni and sweetcorn
  • Ham, pineapple and sweetcorn
  • Ham, mushrooms and black olives

This is a great recipe for getting some veggies into your child. Even if they're not keen on vegetable toppings, just one tablespoon of tomato purée counts as one of their five-a-day. Add vegetable crudités on the side or perhaps some sweet potato fries and you're on to a winner!

Monday, 20 March 2017

MIXED BEAN CHILLI


Here's a little something for meat-free Monday! Even though we're a family of omnivores, I think it's important to incorporate meat-free food into our weekly menu, so I usually try to make at least one vegetarian dinner a week, and our lunches are often meatless. Actually, come to think of it, this particular recipe would be suitable for a vegan diet too, if you omit the yogurt accompaniment or swap it for a dairy-free alternative.

Sadly (although predictably), this chilli turned out to be a bit on the spicy side for my kids (and a bit on the vegetarian side for my husband, a confirmed meat-eater) but it freezes well so a batch lasts me a while. I like to eat it for lunch as a filling for a baked potato or, if I'm feeling slightly less virtuous, I'll serve with tortilla chips and a good dollop of cooling natural yogurt.

The vegetables and beans in this tasty chilli all count towards your five-a-day (although apparently beans only count as one portion a day, no matter how many you eat) so I reckon you'd be well on your way to this target if you ate this for lunch or dinner.


Mixed Bean Chilli (vegetarian/vegan)


Serves 4

½ tbsp vegetable oil
1 onion, finely chopped
2 garlic cloves, finely chopped
1 fresh red chilli, deseeded and finely chopped
2 tsp each ground cumin and paprika
1 tsp mild chilli powder
1 each red, yellow and red pepper, deseeded and diced (360g total prepared weight)
400-g can chopped tomatoes
400-g can mixed beans in mild chilli sauce
400-g can red kidney beans in water, drained and rinsed
200-g can chickpeas, drained and rinsed
1 tbsp tomato purée
2 tbsp chopped fresh coriander

Heat the oil in a large saucepan over a low-medium heat and cook the onion for 8-10 minutes, or until softened. Add the garlic and red chilli and cook for a further minute.

Add the cumin, paprika and chilli powder and mix until the onion is coated in the spices. Increase the heat to medium-high, then stir in the peppers, tomatoes, beans, chickpeas and tomato purée.

Bring to the boil, then reduce the heat and simmer, stirring occasionally, for 30 minutes, until thick and reduced. Stir in the coriander just before serving.

Sunday, 12 March 2017

CARROT CAKE OVERNIGHT OATS


I definitely find that eating a nutritious, filling breakfast sets the tone for my whole day's eating. However, with two little girls to get fed, dressed, kitted up and out the door by 8.30am, mornings in our house can be hectic and if I'm running short on time I often find myself skipping breakfast.

That's why I'm loving overnight oats right now. When I get up in the morning, all I have to do is grab the bowl from the fridge, take a spoon out the drawer and dig right in! Sure, they take a bit of pre-preparation but I can honestly say that I put can them together in five minutes flat (usually while I'm cooking our evening meal) and one batch will last me two breakfasts.

Overnight oats need never become boring because it's so easy to change up the ingredients for new and exciting flavour combinations. Carrot might seem like an odd ingredient to use but, trust me, it totally works!

Carrot cake is my absolute favourite cake so these carrot-cake-inspired overnight oats were always going to be a winner for me. They marry together all the delicious flavours of the a traditional carrot cake - the sweet carrot, warming spices, juicy sultanas and hint of zesty orange - and the walnuts add a welcome crunch against the soft oats.

Carrot cake for breakfast? Yes, please!


Carrot Cake Overnight Oats

Serves 2

80g rolled oats
½ tsp ground cinnamon
½ tsp ground mixed spice
40g sultanas
25g walnut pieces
1 carrot, peeled and finely grated (about 80g prepared weight)
finely grated rind of 1 orange
400ml semi-skimmed milk or unsweetened almond milk
1 tbsp maple syrup

Put the oats and spices in a large bowl and mix until the spices are evenly distributed. Add the sultanas, walnuts, grated carrot and orange rind and stir well.

Divide the mixture between two bowls (or jars/leak-proof containers if you intend to transport the overnight oats). Pour half the milk into each bowl - it should just cover the ingredients. Top each with 1/2 tablespoon of maple syrup and stir gently, then cover with clingfilm or a lid and chill in the fridge overnight.

In the morning, simply give the mixture a good stir and dig in.


Tips
  • I prefer to use finely grated carrot in this recipe because it softens nicely overnight; coarsely grated carrot retains more of its crunch.
  • I've used cow's milk but you can, of course, use non-dairy milk. I've tried this recipe using unsweetened almond milk and it was equally delicious.

Friday, 20 January 2017

HONEY, ALMOND & PECAN GRANOLA


January is all about getting into healthy habits, right? I've got into the rather bad habit of skipping breakfast recently - I know lots of people don't eat breakfast but, for me, it's a diet disaster because I end up feeling ravenous mid-morning and snacking on biscuits and other unsuitable stuff.  Having this granola in the cupboard means that I'm more likely to be tempted to eat breakfast and I've been having it with low-fat Greek yogurt and fresh fruit to pack in extra protein and nutrients.

Now I know that granola is possibly a little on the sweet side to be considered a health food (or even an everyday food) but at least by making your own granola you know exactly how much sweet stuff there is in it. You can also tailor it to your own personal preferences - many commercial granolas contain lots of sugar-heavy dried fruit (especially raisins, which I'm not a fan of) so I like the fact that this version is fruit-free.

I was actually surprised at how simple this was to make - and it smells amazing when it's cooking! It's a good one to make with kids too because they can weigh out the ingredients and mix them together and, to be honest, it's difficult to get wrong. The only real danger comes from the potential to burn it, which is why I've used a fairly low oven temperature.


Honey, Almond & Pecan Granola

Makes 450g

200g jumbo oats
50g sunflower seeds
25g pumpkin seeds
50g flaked almonds
25g pecans, broken into small chunks
75ml honey
2 tbsp rapeseed oil
1 tsp vanilla extract

Preheat the oven to 160°C/325°F/Gas Mark 3.

Place the oats, seeds and nuts in a large bowl.

Put the honey, oil and vanilla extract in a small jug and beat until combined.

Pour the wet ingredients over the dry ingredients and mix until the oat mixture is thoroughly coated. Tip onto a baking tray (you'll need to use one with a rim) and press down with a spatula.

Transfer to the preheated oven and bake, stirring halfway, for 20 minutes, or until light golden brown. Leave to cool on the baking tray, then transfer the granola to an airtight container.

Tips
  • You want the granola to form clumps so resist the temptation to stir it too often once it's in the oven. I stir it halfway through, then press it down with a spatula before returning it to the oven.
  • If you want to add dried fruit to the granola, stir it into the cooled granola (rather than baking it).
  • Regular vegetable oil that you can buy in the supermarket (UK ones anyway) is usually rapeseed oil. It's a good neutral-tasting oil that is low in saturated fat and high in mono-unsaturated fat.
  • Please note that nuts (especially whole ones) can be a choking hazard for young children - personally, I wouldn't give this granola to any child under 5.

Monday, 16 January 2017

BROCCOLI & STILTON SOUP

January is definitely a soup kind of month - there's something immensely comforting about eating a steaming hot bowl of soup when the weather is as chilly as it has been lately. It's also a great portable lunch - I often used to pack up a thermos of soup when I worked in an office. I admit that this recipe is not all that dissimilar to the Cauliflower Cheese Soup I posted a while back (link here) but I hope you'll forgive me because the end result tastes quite different. Although the cheese (and butter) in it might not be so great for the waistline, this soup does at least deliver one of your five-a-day. It's also s(o)uper tasty!

If I'm perfectly honest, my main reason for making this soup was to use up the last of our Christmas cheeseboard. We had a really nice selection of British cheeses this year - creamy Somerset Brie, crumbly Wensleydale with cranberries, tangy vintage Cheddar and strong blue Stilton. I do love a good cheeseboard, but I'm not someone who regularly eats cheese on its own so most of the leftovers were used up in cooking. I just love how oozy and gooey cheese goes when it's melted - yum! There are loads of tasty ways to use Stilton in cooking - my favourites are to add nuggets of it to macaroni cheese and to crumble it over a mushroom or squash risotto.


Broccoli & Stilton soup

Serves 3-4

10g butter
2 tsp vegetable oil
1 onion, chopped
1 garlic clove, chopped
150g (peeled weight) potato, peeled and cut into 1-cm cubes
225g broccoli, separated into florets
750ml vegetable stock (I used Marigold Swiss Vegetable Bouillon Powder)
100g Stilton (or other blue cheese), cubed
freshly grated black pepper and nutmeg, to season

Heat the butter and oil in a large saucepan over a lowmedium heat. Add the onion to the pan and cook, stirring occasionally, for 8 minutes, until softened. Stir in the garlic and cook for a further minute. Add the potato, increase the heat a little and cook for 5 minutes.

Put the broccoli into the pan and pour over the stock - don't worry if the stock doesn't quite cover the broccoli. Bring to the boil, then partially cover the pan and simmer for 15 minutes, or until the broccoli is very tender.

Season to taste with plenty of black pepper and nutmeg. Remove the pan from the heat and, using a hand-held stick blender, process the soup in the pan until smooth (or leave the soup a little chunky if you prefer).

Add the Stilton to the soup, return the pan to a low heat and stir until melted. Transfer to bowls and serve.


Tips
  • Skip the butter if you're counting the calories - it's there for the flavour but the soup will taste perfectly fine without it.
  • I use the broccoli stalk as well as the florets - just remember to peel off and discard the thick outer skin before slicing.
  • A stick blender makes the job of blending soup incredibly easy but you can, of course, use a blender or food processor instead. Just allow the soup to cool down a little before processing and work in batches if necessary.
  • I like my soup thick, but feel free to add extra stock (or even a little milk) if you prefer a thinner consistency.

Thursday, 29 December 2016

NO-BAKE WHITE CHOCOLATE & RASPBERRY CHEESECAKE


I made this cheesecake for one of our Christmas Day desserts this year (to go with the more traditional offerings of sherry trifle and Christmas pud). It proved popular with everyone so I've already decided that cheesecake will be a permanent feature of our Christmas Day menu in future. Yum!

The great thing about this recipe is that it is really easy to adapt. You don't have to use white chocolate - dark chocolate and milk chocolate work just as well - and you can also use different varieties of biscuits in the base or fruits in the topping. I chose raspberries because they're my oldest daughter's favourite fruit yet we don't have them very often, and they have the additional bonus of being a rather festive colour!

Here in the UK, this style of cheesecake with a biscuit base and cream cheese topping is probably more widely known than its baked counterpart. Not all recipes will contain chocolate in the topping but I find it a useful ingredient because it means that the topping will set without using gelatine. Besides, what recipe can't be improved by chocolate?

I haven't even mentioned the best bit yet. This recipe is so easy to make. Standing-on-your-head-with-your-hands-tied-behind-your-back easy! There's no baking involved (just a bit of gentle mixing) and it can be made in advance too. The only thing that could possibly go wrong - and I'm only mentioning this because it has happened to me - is that you could burn the chocolate when you melt it. Consider yourself warned!


No-bake White Chocolate & Raspberry Cheesecake

Serves 8-10
Biscuit base
175g digestive biscuits
75g unsalted butter, melted

Topping
225g white chocolate
150g full-fat soft cheese (I use Philadelphia)
20g caster sugar
375ml extra-thick double cream
225g fresh raspberries
white chocolate stars, to decorate (optional)

Line the base of a 20-cm round springform cake tin.

Crush the biscuits to make fine crumbs. Place in a bowl, pour in the melted butter and stir until the biscuit crumbs are thoroughly coated. Tip into the prepared tin and press down using the back of a spoon to form a base with an even thickness. Place in the fridge to chill whilst you are making the topping.

Break the chocolate into pieces and place in a heatproof bowl. Place in the microwave and heat on MEDIUM in bursts of 30 seconds, stirring in between, until melted. Set aside to cool slightly.

Put the soft cheese in a large bowl, add the sugar and mix thoroughly. Stir in the cooled melted chocolate, then gently fold in the cream. Spoon the cream cheese mixture on top of the biscuit base and smooth the surface. Return the tin to the fridge to chill for 3-4 hours, or overnight.

Run a sharp knife around the inside edge of the tin, then unclip the tin. Transfer the cheesecake to a plate and arrange the raspberries over the top. Sprinkle over the white chocolate stars to decorate, if using.


Tips
  • To crush the biscuits into crumbs, I tend to put them in a strong freezer bag and bash with a rolling pin. This is a job you can easily delegate to your kids - just keep an eye on them (mine can become a little over-zealous when it comes to bashing). You can do this using a food processor if you prefer.
  • Another way to melt chocolate is to set the bowl over a saucepan of  gently simmering water and stir regularly until melted. Just make sure that the base of the bowl doesn't touch the water and that none of the water gets into the chocolate.
  • Whichever method you use for melting the chocolate, it's best to remove the bowl from the heat source before the chocolate is fully melted as the heat of the melted chocolate should be enough to melt any remaining solid bits of chocolate. 
  • It is important to use full-fat soft cheese in this recipe because the topping won't set properly if you use a lower-fat version. It'll still taste nice though!  
  • I tend to use extra-thick double cream in this recipe for ease of use - you don't have to whip it before using, thus saving a bowl's worth of washing up! You can use regular double cream instead, but you will need to whip it until it forms very soft peaks before folding it very gently into the soft cheese and chocolate mixture.

Saturday, 24 December 2016

CLASSIC MINCEMEAT


Mince pies are a Christmas staple here in the UK. For anyone who's not familiar with this delicacy, they are individual sweet pies containing a mixture of dried fruits, sugar and spice called mincemeat, which despite its name doesn't contain any meat (unless you count the suet, although these days many British cooks use vegetable suet rather than the traditional beef suet). Over here, we can buy ready-made mincemeat in pretty much all supermarkets (well, at least we can around Christmas-time) but honestly it's so simple to make at home that I'm surprised that more people don't. Mincemeat can be made a good few weeks before you intend to use it; in fact, it should be made in advance to allow the flavours to mingle and mature. So apologies for my tardy posting of this recipe - it's admittedly somewhat late for Christmas 2016!

In our household, we leave out mince pies and real ale for Santa, and a carrot for Rudolph. Today, my 5-year-old insisted that we picked the biggest carrot we had so that the other reindeer could have a bite too!


If you plan to keep the mincemeat for a while before using it, it's important to sterilise the jars. I find that the easiest way to do this is to wash them in hot, soapy water, then rinse well, place on a baking tray and transfer to an oven preheated to 140°C for at least 20 minutes. Leave to cool down a little before adding the mincemeat because (1) you don't want the glass to shatter when adding the cold mincemeat to a hot jar, and (2) this will prevent the suet from melting.

I like to use a recipe for a sweetened orange-flavoured pastry that I found in Good Food magazine a few years ago when making my mince pies. I use a round fluted cutter for the bases and top with pastry stars.


Classic Mincemeat

Makes 3 x 450g-jars
150g each sultanas, raisins and currants
70g chopped mixed peel
120g peeled and grated Bramley (baking) apple
juice and grated zest of 1 large orange
juice and grated zest of 1 lemon
150g dark muscovado sugar
½ tsp ground mixed spice
½ tsp ground cinnamon
50ml brandy
70g vegetarian suet

Put all the ingredients in a large bowl and give them a good stir (yes, that's it!) Cover and leave to soak in the bowl overnight before transferring to sterilised jars. I give the jars a shake every couple of days as the liquid tends to sink to the bottom. The mincemeat should be fine to keep in a cool, dark place for a few months but store the jar in the fridge once opened.

Wednesday, 30 November 2016

CHOCOLATE REFRIGERATOR CAKE


Chocolate refrigerator cake (or tiffin, as we know it in our household) - what's not to like? It's dangerous for me to have this in the house because it's so tempting to nip to the fridge for an extra square (it goes SO well with a cup of tea), yet sadly it's hugely calorific. Luckily, this week I had a good excuse to make it because it was my birthday. And we all know that calories consumed on our birthdays don't count, don't we?

Before I had my kids, one of the things I looked forward to doing with them was baking. I have fond memories of baking cakes with my maternal grandmother and I have even more respect for the endless patience she showed my 5-year-old self now that I realise just how stressful baking with small children can be! My solution is to keep it simple by getting my kids to help with recipes that don't require precision or a light touch. Chocolate refrigerator cake is ridiculously simple to make - as the name suggests, it doesn't even need to be baked. The children can weigh the ingredients, crush the biscuits, cut up the fruit with scissors (obviously with assistance), stir everything together and press it into the tin. Oh, and lick the bowl!

The fact that this ended up looking festive (thanks to the white chocolate star sprinkles) was a happy coincidence but, as it happens, it would make a great Christmas gift. It keeps incredibly well and I've actually sent a slab of it through the post as a present on more than one occasion. It would look super pretty cut into small squares, then packed in a clear cellophane bag and tied with ribbon.

Tips
  • If you don't have a square tin, you can use a traybake tin - just make sure that it has a similar surface area.
  • To stop the golden syrup from sticking to the spoon, place the spoon in a cup of boiling water for a minute or so before using. The syrup will then slide off the spoon very easily.
  • I like to include almonds in this recipe, but they're completely optional. Aside from the allergy risk, they can be a choking hazard for small children. If you choose to leave them out, just replace with an equal weight of dried fruit.
  • This is an incredibly versatile recipe - you can use whatever biscuits and dried fruit you fancy, as long as you keep the overall weight the same.


Chocolate refrigerator cake

Makes 16 squares
100g unsalted butter, plus extra for greasing
2 tbsp golden syrup
180g dark chocolate, broken into squares (I used Cadbury's Bourneville)
200g digestive biscuits
50g glacé cherries, quartered
25g dried apricots, chopped
25g raisins
25g almonds, chopped (optional)
220g milk chocolate, broken into squares (I used Cadbury's Dairy Milk)
white chocolate star sprinkles, to decorate

Grease and line a 23-cm square cake tin.

Place the butter, golden syrup, and dark chocolate in a small saucepan over a very low heat (I use my hob's lowest setting) and melt gently, stirring occasionally.

Meanwhile, place the biscuits in a strong plastic bag and crush with a rolling pin. I like to leave some chunks and not completely pulverise the biscuits into crumbs.

Put the crushed biscuits, dried fruit and almonds into a large bowl and pour over the melted chocolate mixture. Stir well until everything is completely coated in chocolate. Tip into the prepared tin and, using the back of a spoon, press down to cover the base completely. Transfer to the fridge and chill for at least 10 minutes.

Melt the milk chocolate, either in the microwave or in a heatproof bowl set over a saucepan of gently simmering water. Pour the melted chocolate into the tin and spread it out to form a thin layer over the biscuit base. Scatter over the sprinkles.

Return the tin to the fridge and chill until set. Remove the tiffin from the tin and cut into squares using a large heavy-bladed knife.

Images and text © Louisa Smith

Sunday, 16 October 2016

SUPER-QUICK PEAR & CHOCOLATE PORRIDGE


It's suddenly got pretty cold and nippy in the mornings in my part of the world, so a nice, warming bowl of porridge has been a very welcome addition to the breakfast menu  and a good incentive to get out of  bed in the morning!

It's not the traditional way, of course, but I've always used my microwave to cook porridge. I used to buy individual sachets of microwave oats but then I discovered that you could get large bags of superfast oats that were essentially the same raw ingredient, only a lot cheaper. The only downside to cooking porridge in the microwave is that it has a tendency to boil over so you can't just bung it in and go off to do something else while it cooks  you need to watch it. It only takes 3 minutes though! I think the choice of  bowl helps too - if you use a deep bowl, rather than a shallow one, it is less likely to boil over.  

I've eaten porridge with various toppings over the years but it only occurred to me very recently to try pear and chocolate and now it's one of my favourites. The hazelnuts add a bit of crunch, which is a nice contrast to the creamy porridge.


Super-quick pear and chocolate porridge

Serves 1
40g superfast/quick-cook oats
285ml semi-skimmed milk (or other milk of your choice)
1 tbsp dark chocolate chunks
1 small pear, peeled and chopped
10 hazelnuts, chopped (optional)

Put the oats into a deep bowl and pour in the milk. Microwave on High for 2 minutes, stirring halfway (my microwave is 900W  if your microwave is a different wattage, adjust the timings accordingly).

Stir in the pear and cook for a further minute. It's important to watch the porridge closely as it cooks as it can easily boil over  if it looks like it's going to, remove from the microwave and give it a stir,  then continue to cook in 15 second bursts. Leave to stand for 1 minute to allow the porridge to thicken.

Stir in the chocolate chunks and hazelnuts, if using. Tuck in!

Monday, 10 October 2016

CLASSIC MACARONI CHEESE


Macaroni cheese is a staple meal in our household. My eldest daughter ranks it as her joint #1 meal (along with fish and chips) and my husband is a massive fan too since it was his favourite dinner as a child. Therefore, I thought it was about time that I shared my recipe for a classic macaroni cheese. I've called it 'classic' because it is a fairly basic version that could easily be adapted to include other ingredients. I like to mix in cauliflower and broccoli florets, and my family enjoys it with sweetcorn and ham. To be honest, I don't always add the crunchy topping because the kids are often screaming (literally!) for their dinner and don't want to wait the extra five minutes it'll take to sort this out. It is a nice addition on those occasions when mealtimes aren't quite so fraught though.

I feel I should apologize for posting yet another pasta recipe but the truth is that my family eats a LOT of pasta. I have to make a conscious effort to limit pasta to just three dinners a week, such is my small girls' appetite for the stuff! I am yet to meet a child that doesn't like pasta (although I'm certain they must exist) but when I was growing up in the 1980s we only ever had pasta as spaghetti Bolognese and canned spaghetti in tomato sauce. I often wonder how my mother coped without this fantastic fallback ingredient, which is so cheap, easy to store, quick to cook, and versatile.

For ages, I didn't think I could make cheese sauce I remember using cheese sauce granules that you mixed with boiling water when I was a student. It was pretty artificial-tasting! I finally got the hang of making cheese sauce when I was cooking baby purées for my oldest child  she developed a taste for a particular purée that was made from cheese sauce mixed with mashed cod and vegetables, which I ended up making countless times. I discovered that warming up the milk before adding it to the butter and flour mixture made the process a lot easier, not to mention quicker, and I've never looked back!


Classic macaroni cheese

Serves 2 adults and 2 children (generously)
300g dried macaroni

Cheese sauce
30g butter
30g plain flour
300ml full-fat milk
good pinch of freshly grated nutmeg
90g vegetarian extra-mature Cheddar cheese, grated

Crunchy topping
20g natural dried breadcrumbs (I like to use panko)
30g vegetarian extra-mature Cheddar cheese, grated

Bring a medium-sized saucepan of water to the boil. Add the macaroni, bring back to the boil and simmer for 1012 minutes (I find that macaroni takes longer to cook than other pasta shapes), until tender but firm to the bite.

Make the cheese sauce while the macaroni is cooking. Put the butter in a small saucepan and melt over a lowmedium heat. Pour the milk into a jug and microwave for 2 minutes to warm through. Once the butter is bubbling, add the flour, stir to make a paste and allow to bubble for 1 minute. Start adding the warmed milk to the butter and flour mixture, a little at a time, stirring vigorously until each addition has been incorporated. To start with, the mixture will form into a lump but just keep stirring frequently and once you've added enough milk it will transform into a smooth sauce. When you have added all the milk, increase the heat to medium and continue to cook, stirring frequently, for a further 2 minutes. Remove the pan from the heat and add the nutmeg and cheese, then stir until the cheese has melted and the sauce is smooth.

Meanwhile, preheat the grill to medium.

Drain the macaroni and tip it into the saucepan containing the cheese sauce. Stir until the pasta is thoroughly coated in the sauce. Transfer to a 1.5-litre baking dish.

Mix together the breadcrumbs and the remaining cheese, then scatter over the macaroni and cheese sauce. Place under the preheated grill and cook for 5 minutes, or until the topping is golden brown. Serve with freshly cooked vegetables (frozen sweetcorn and peas are our favourites) on the side.
    

Saturday, 8 October 2016

MUSHROOM RISOTTO


Before I say anything about this recipe, let me just put this out there  I LOVE MUSHROOMS! Unfortunately for me, my family hates them with an equal passion. As a result, whenever I'm dining on my own I usually cook something that is so utterly mushroom-heavy that none of them would ever eat it. This recipe fits that bill. It's the dried porcini mushrooms that do it. Before I tried adding those to my risotto it just wasn't, you know, mushroomy enough, but the porcini give it that extra depth of earthy mushroom flavour. Occasionally, if I fancy a bit of variety, I add a couple of handfuls of spinach a couple of minutes before the end of the cooking and maybe crumble over a little blue cheese too.

Risotto isn't the quickest meal to make but it's not exactly difficult either. I certainly don't stir it constantly  I find a quick stir every couple of minutes perfectly adequate. And, of course, the added bonus of making risotto for dinner is that it gives you an excuse to open a bottle of wine  and enjoy a glass while the risotto is cooking!


Mushroom risotto

Serves 1
10g dried porcini mushrooms
1 tsp olive oil
10g butter
2 shallots, finely chopped
1 garlic clove, finely chopped
150g chestnut mushrooms, sliced
80g risotto rice (I use Arborio)
½ tsp dried thyme
75ml dry white wine
225ml boiling vegetable stock (I use Marigold Swiss Vegetable Bouillon)
30g Parmesan cheese (or vegetarian alternative), grated

Place the porcini mushrooms in a cup and pour over boiling water to cover. Set aside to soak for at least 10 minutes.

Heat the oil and half the butter over a low heat in a medium-sized saucepan. Add the shallots and cook for 5 minutes, or until softened. Add the garlic and cook for a further minute. Increase the heat slightly, add the chestnut mushrooms and cook for 5 minutes. Stir in the rice and thyme.

Pour in the wine and simmer until the liquid has been absorbed. Add the stock a little at a time, stirring frequently, allowing each addition to be absorbed before adding the next. This process will take a good 2025 minutes.

Drain the porcini mushrooms, reserving the soaking liquid, and slice. Add the porcini to the pan along with the reserved soaking liquid. Continue to cook, stirring frequently, until the liquid has been absorbed and the grains of rice are tender.

Remove the pan from the heat, add the Parmesan cheese and the remaining butter, and stir until melted. Enjoy!

Wednesday, 28 September 2016

MANGO, BANANA & COCONUT SMOOTHIE BOWL

`
My Instagram feed has been inundated with images of gorgeous smoothie bowls recently so I thought it was about time that I got in on the act!

Smoothie bowls have two key components  the smoothie (obvs!) and the toppings. The smoothie needs to be thicker than a regular smoothie and to have a spoonable texture. For a totally dreamy, creamy smoothie, it helps if you use a frozen fruit base  banana is the classic, but other frozen fruits can be used too. As far as the toppings are concerned, let your imagination run riot! From an aesthetic point of view, it's nice to use ingredients in a range of colours but try to choose flavours that complement those of the smoothie. I've used fresh fruit and coconut flakes for my toppings, but nuts, seeds and/or granola (especially for a breakfast smoothie bowl) would make delicious additions and add a tasty crunch.

I'm really pleased with this recipe  it's seriously yummy. I'm definitely going to keep trying different combinations and I'm sure that my kids will be willing guinea pigs when it comes to the tasting!


Mango, banana & coconut smoothie bowl

Serves 1
1 banana, cut into chunks
½ mango, stoned, peeled and chopped
125g coconut-flavoured yogurt (I used Lidl's fat-free Greek-style coconut and vanilla yogurt  fab value at 89p for four 125-g pots)
1 tbsp unsweetened coconut flakes
1 kiwi, peeled and chopped

The day before, place the banana chunks on a baking tray and open-freeze. (They can be transferred to a freezer bag once they are hard.)

Set aside some of the mango for the topping, then put the remainder in a blender (or in the beaker of a stick blender) with the frozen banana and blend until completely smooth. Stir in the yogurt, then spoon the smoothie into a serving bowl.

Top the smoothie with the reserved mango, the coconut flakes and kiwi. Dig in before the smoothie has a chance to melt too much.

Thursday, 22 September 2016

CAULIFLOWER CHEESE SOUP


I've been wanting to make this soup for a few weeks but couldn't quite bring myself to do so because it would be like admitting that summer was over. I know that there are lots of lovely summery soup recipes out there, but for me soup will always be an autumn/winter meal  a cosy, comforting kind of food that is as synonymous with the chillier months of the year as falling leaves, winter woollens and crackling log fires. Well, it's now (as of yesterday) officially autumn here in the UK, so I figured that there could be no better way to mark the changing seasons than by cooking up a batch of one of my favourite soups.

I think this recipe started out as a broccoli and Stilton soup (which, in my opinion, is equally tasty) and evolved from there. If I'm perfectly honest, no-one in my family eats cauliflower (although I persevere with offering it to the kids) and my oldest child doesn't eat soup, so I'm not exactly on to a winner here with my family. It's no great hardship  all the more yummy soup for me!

It's important to use a good strong Cheddar cheese in this recipe. I like to use a bit of butter when I'm making a creamy soup because I think it adds to the flavour, but you don't have to  just use a little more oil. This is not a slimming soup (although there's no reason you couldn't enjoy it while dieting if you watch the portion size) but given that my body is going to be spending the next few months shrouded in layers of winter clothes I couldn't care less!


Cauliflower cheese soup

Serves 4

10g butter
2 tsp vegetable oil
1 onion, chopped
1 garlic clove, chopped
150g (peeled weight) potato, peeled and cut into 1-cm cubes
1 head of cauliflower, separated into florets (about 600g prepared weight)
750ml vegetable stock (I used Marigold Swiss Vegetable Bouillon Powder)
115g extra-mature vegetarian Cheddar cheese, grated
pinch of freshly grated nutmeg

Heat the butter and oil in a large saucepan over a lowmedium heat. Add the onion to the pan and cook, stirring occasionally, for 8 minutes, until softened. Stir in the garlic and cook for a further minute. Add the potato, increase the heat a little and cook for 5 minutes.

Put the cauliflower into the pan and pour over the stock - don't worry if the stock doesn't quite cover the cauliflower. Bring to the boil, then partially cover the pan and simmer for 15 minutes, or until the cauliflower is very tender.

Remove the pan from the heat and add the cheese, stirring until melted. Season to taste with grated nutmeg. Using a hand-held stick blender, process the soup in the pan until smooth (or leave the soup a little chunky if you prefer).

Transfer to bowls, sprinkle over extra grated cheese and nutmeg (if you like) and serve.

Tuesday, 13 September 2016

BASIL PESTO


I absolutely love pesto. In our household, we mostly stir it into pasta – it makes a great change from a tomato-based sauce – but there are plenty of other ways to enjoy pesto, whether you spread it on sandwiches or bruschetta, drizzle it over pizza, or simply use it as a dip.  
I like to make my own pesto – I quite enjoy the ritual of whizzing up the vibrant green gloop in my food processor (I have a special mini one that makes the job especially easy). Of course, you can buy perfectly decent ready-made pesto in the supermarket but in my opinion home-made just tastes so much fresher. It’s a good emergency recipe too because I usually have all the ingredients to hand, including a pot of basil on my kitchen windowsill. Plus – a major bonus in my eyes – fresh pesto can be frozen, meaning I never waste a drop. I freeze mine in small (100ml capacity) pots that I originally bought when I made baby purées.

A good rule of thumb when making pesto is to use a single quantity of basil leaves and double quantities of pine nuts and Parmesan. So, for example, if you have 20g of basil leaves, use 40g of each pine nuts and Parmesan. I don’t tend to measure my oil; I just add the oil until the consistency of the pesto seems right, but the quantity given in this recipe should yield a thick but spoonable pesto – feel free to adjust to suit your own personal preference.

Basil pesto

Makes approximately 200g
50g pine nuts
25g fresh basil leaves
50g Parmesan cheese (or vegetarian alternative)
1 garlic clove, crushed
75ml olive oil (regular is fine; not extra-virgin)
Freshly ground black pepper

Dry-fry the pine nuts in a small frying pan – they’re ready when they’re golden brown and you can smell a toasty aroma from the pan. Immediately transfer them to a plate to cool down – do not leave in the pan or they’ll burn.
Pick the leaves from the basil, then wash and pat dry with kitchen paper. Cut the Parmesan into cubes (you can grate it but I’ve tried both ways and can’t see any discernible difference in the finished pesto, and grating is frankly more effort).
Put the cooled pine nuts, basil, Parmesan and garlic into a mini food processor along with half the oil. Process until everything is well chopped, then slowly add the remaining oil until the pesto has reached the desired consistency. Season to taste with freshly ground black pepper – I don’t use salt because Parmesan can be pretty salty.
Hey presto – home-made pesto!

* Freeze any leftover pesto immediately in small freezerproof containers. To defrost, simply remove from the freezer and leave out on the side until fully defrosted. It’s not a great idea to defrost in the microwave because it’s too easy to overdo it and end up with a congealed lump but, if you’re in a hurry, you could pop the unopened container in a bowl of boiling water to speed up the defrosting process.

Saturday, 10 September 2016

APPLE, CINNAMON & RAISIN OVERNIGHT OATS

The apple tree in our garden has produced a good crop this year. Unfortunately, the apples are a little sour for my liking (and the kids say they're 'yuck') so I'm having to come up with different ways to use them up and disguise the taste without resorting to heaping on the sugar.

Happily, this dilemma reminded me of a recipe I used to make a few years ago. Overnight oats are all the rage at the moment but when I first made this it was known as Bircher muesli. Back then, I made it to take to work with me and had a cute insulated canister to carry it in (any excuse to buy a new item of kitchen kit!) but you really don't need this - any leakproof container will do, or just a bowl if you're eating at home.

I've been meaning to revisit overnight oats for a while, so my glut of apples provides me with the perfect opportunity. The raisins provide a pop of sweetness and the cinnamon pairs so well with the apples (think apple pie and mulled apple juice...mmmmm!).

If you're using rolled oats, it's best to leave them to soak overnight but if you use quick oats, which are more finely milled, they would be fine to eat after soaking for an hour or so. I prepare mine the night before because I find that easiest and I like the oats nice and soft. You can add the apple (along with maybe a sprinkling of nuts or seeds, or a dollop of yogurt) on the morning of eating if you prefer, but I don't think that's necessary because the apple doesn't go brown and yucky overnight as you might expect.


Apple, cinnamon & raisin overnight oats

Serves 2
1 apple
70g oats
40g raisins
1 tsp ground cinnamon
400ml milk of choice

Grate the apple (including the skin) into a large bowl. Add the oats, raisins and cinnamon and stir gently to combine.

Divide the mixture between two small bowls or 300ml capacity jars, then pour over the milk to cover. Transfer to the fridge overnight.

Tuesday, 6 September 2016

COURGETTE, PEA & FETA FRITTATA

I wouldn’t consider myself a fussy person (when it comes to food anyway) but I’ll admit that I’m not a huge fan of eggs. It’s not the egg per se, more the yolk (I know, I know - that’s supposed to be the best bit!) and I need my eggs to be cooked all the way through or it makes me feel quite queasy. Weird, eh? That’s what’s so great – in my eyes at least – about frittatas. Unlike with an omelette, which can be a bit gelatinous for my liking, when you make a frittata you place the frying pan under the grill to finish it off so the eggs are guaranteed to be fully cooked.
I’ve been eating frittatas for lunch quite often recently. They’re pretty healthy, very filling and a great way to use up odds and ends of ingredients. I also like the fact that they’re a one-pot meal – I have enough washing up to do come dinnertime without adding to the pile!
This version with feta, courgette and peas is one of my favourites – the salty feta adds a great hit of flavour. If I have a bag of salad leaves in the fridge (and they haven’t gone slimy yet), I’ll pop a handful of those to the top of the frittata to add to the veg count.
It's important to use the right size of frying pan for this recipe - too big and the egg mixture won't cover all the vegetables. The one I use has a diameter of 20cm.


Courgette, pea & feta frittata

Serves 1  
1 tsp olive oil
½ large courgette, diced
2 spring onions, sliced
Small handful of frozen peas
3 large eggs
1 tbsp milk
1 tbsp chopped fresh mint (or ½ tsp dried mint)
45g vegetarian feta cheese, cut into small cubes
Handful of watercress or other salad leaves, to serve


Heat the oil over a medium heat in a small ovenproof frying pan. Add the courgette to the pan and cook, stirring occasionally, for 5 minutes, or until the courgette has started to brown at the edges. Add the spring onions and peas and cook for a further minute. Meanwhile, preheat the grill.  

Crack the eggs into a jug and add the milk and mint. Beat well, then gently stir in the feta cheese. Pour the egg mixture into the frying pan and shake so it covers all the vegetables and the ingredients are evenly distributed.
Continue cooking until the underside of the frittata is brown and set, then place the frying pan under the preheated grill.  Cook for 3-4 minutes, until the top of the frittata is golden and bubbling. Slide out of the frying pan onto a plate. Cut the frittata into wedges and top with the watercress leaves. Eat!